New threats, new allies, new tools, and new experiences that bring you into WarzoneTM like never before. Learn about all the important key additions and changes coming in the free-to-play Warzone 2.0 experience before you drop into Al Mazrah this week!
Welcome to Warzone 2.0
Get ready to drop in.
Call of Duty®: Warzone™ 2.0 will redefine the franchise’s free-to-play experience with an all-new way to play: DMZ, which Infinity Ward gave an overview of here. Its Battle Royale mode will also get some incredible new features in addition to fan-favorite returning concepts based on community feedback. And across all game modes, expect new strategies to attain victory through retooled vehicle mechanics, aquatic combat, and more.
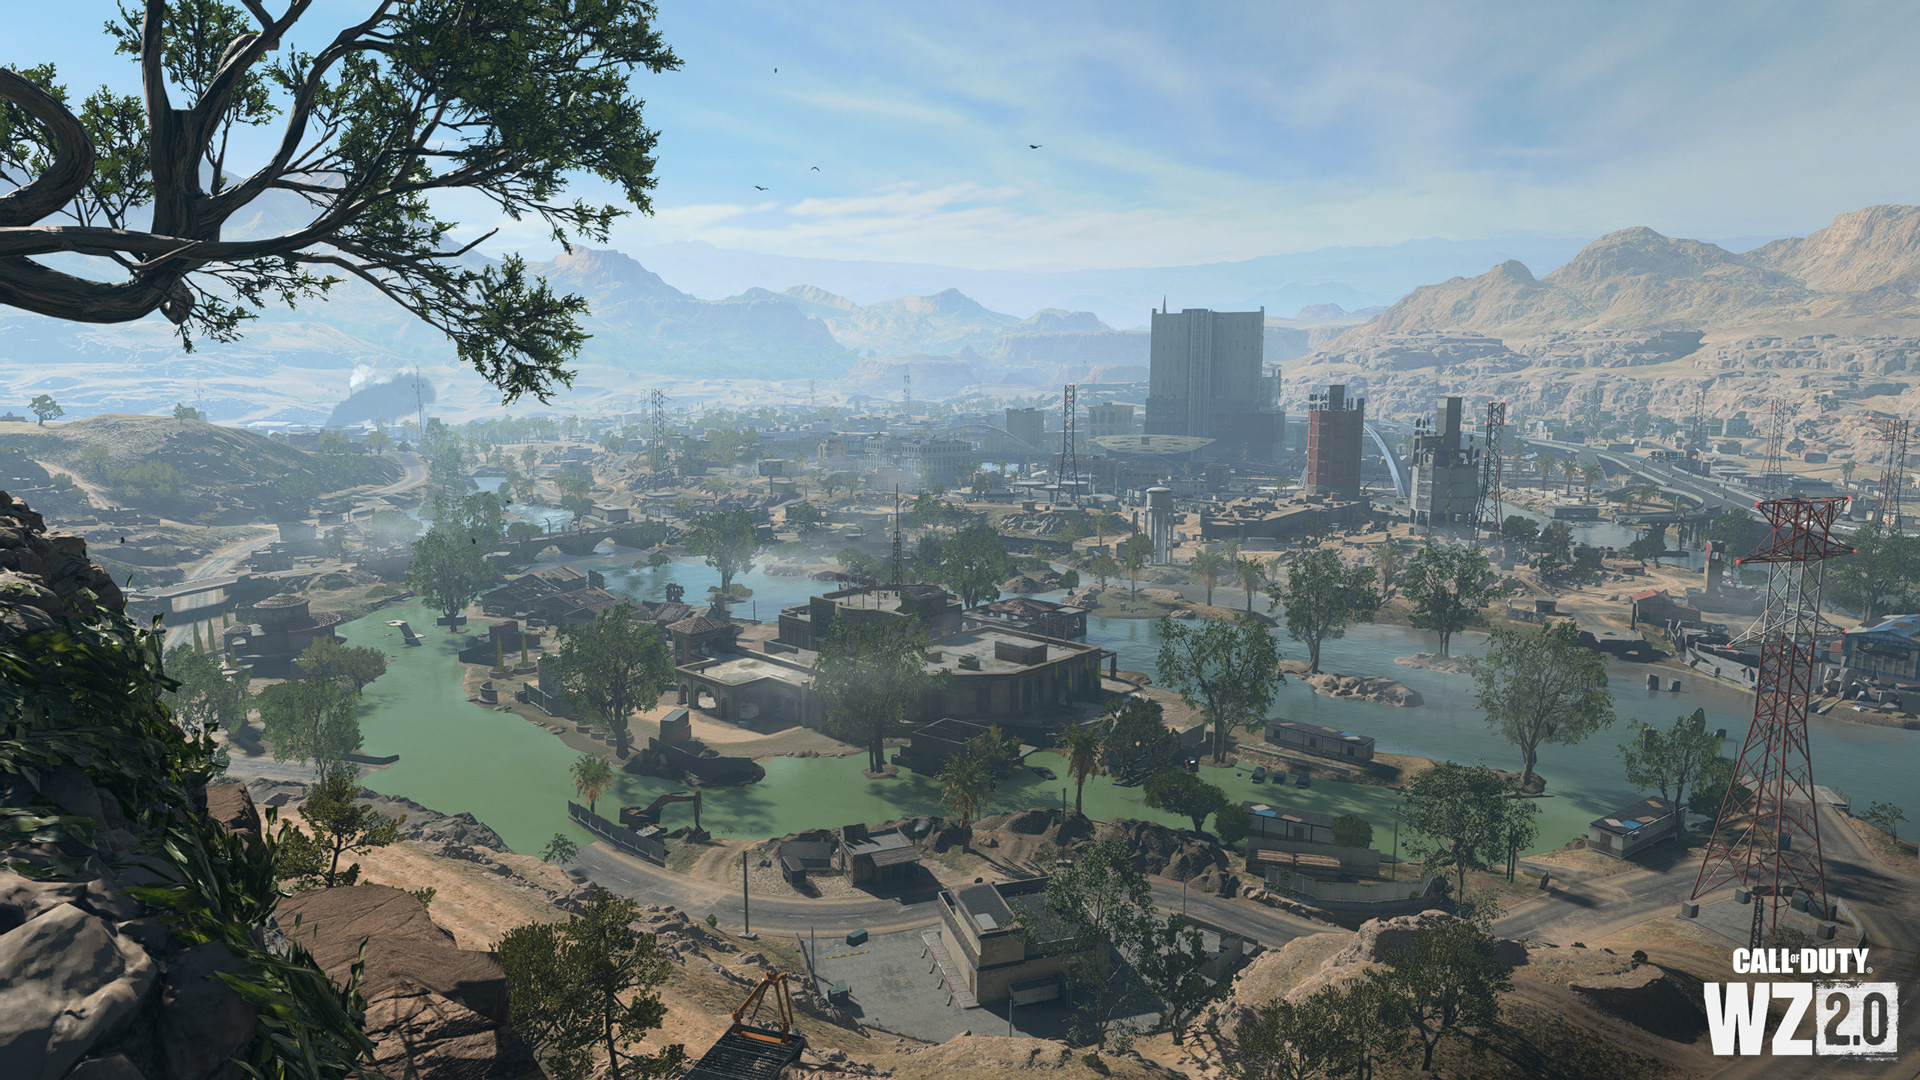
All of this is set to take place in Al Mazrah, a battleground from the Call of Duty®: Modern Warfare® II universe. Need a full and annotated tour of the entire map? We cover that in-depth here.
Direct Developer Comms: Trello Board Coming Online
To support WarzoneTM 2.0, Raven Software is set to launch a Trello Board, which will track and provide updates on live issues players may have or may encounter while playing the game. It will also include Patch Notes, Playlist updates, and XP event information. You can visit that Trello Board for these direct communications from the developer here. In addition, bookmark the following page and expect Warzone 2.0 (and Modern Warfare® II) Patch Notes to be available here.
In terms of general tactics, however, here’s what you need to know:

– Loadout, Circle Collapse, and Gulag Updates. Know how to get those precious Loadouts, what happens when a circle collapse splits up, and tips for surviving the new Gulag.
– Interrogate Your Enemies. If an enemy is downed and nobody seems to be around, try interrogating them to gain intel.
Loadouts, Custom Weapons, Streamlined Backpack

Welcome to Warzone!
At the start of all Battle Royale matches, when Operators drop from a cargo plane somewhere over Al Mazrah, expect to have only an X12 Handgun, two Armor Plates, and a pair of fists to your name. Everything else must be collected within the map, including a proper Loadout.
Returning from the original Warzone, a Loadout in Battle Royale contains the following:
– Primary and Secondary Weapon
– Lethal and Tactical Equipment
– Perk Package — A premade set of four Perks containing Modern Warfare II Base, Bonus, and Ultimate Perks.
Loadouts arrive in Loadout Drops, which can descend at any time between the second and sixth circle collapses through an in-game event.
Loadouts can also be earned earlier in match by clearing out a Stronghold, once those are available (see Stronghold section for more details). If a Loadout it lost, or if you want to have elements from multiple Loadouts on your Operator, you can earn additional Loadouts by clearing another Stronghold or picking up another Loadout Drop.
Custom Weapons
Instead of buying Loadouts from a Buy Station, the Buy Station contains only Custom Primary Weapons from your Loadouts.
This allows you to spend that earned Cash on a weapon that fits your personal meta, but those other Loadout items are only earned by risking the trip to a Loadout Drop or by clearing out a Stronghold.
See the Buy Station section for more info.
Streamlined Backpack
As opposed to DMZ, Battle Royale features a Backpack that works in a more passive way — as an extra place for equipment, Armor Plates, and other small items if those spaces are occupied on your Loadout or Operator. At any time, you can switch out active Loadout Items with whatever is in the Backpack.
In terms of item gathering, there is no menu navigating outside of these containers: Duffel Bags, Cash Registers, Weapon Lockers, and Medicine Cabinets. By default, Cash, Armor, and any items that you already have in your Loadout or Backpack (e.g. a specific ammo type) are automatically picked up.

After successfully downing an enemy player in a squad-based mode, you can either go for the coup de grâce or, more strategically, interrogate them.
By interacting with a downed enemy player, you will learn the locations of all their allies, via red dot pings on the minimap, as well as outlines in the environment (like a Snapshot Grenade), for a short period of time. You will also see the locations of any placed equipment they may have. This effect also dissipates once the interrogatee dies or is revived.
Of course, this tactic should only be done if the enemy squad is nowhere to be found after one of their allies is downed. The person being interrogated can also call for help, which marks the interrogator on the map.
Essentially, this new mechanic offers an incredible amount of intel for taking a few seconds to interact with a downed Operator. We do not recommend doing this during an active gunfight, but if a takedown happens in a large building and nobody else seems to be around, shake down that injured Operator and learn where their friends are.
In some games, the circle collapse will behave as normal: one circle that closes in several stages. All previous tactics for outrunning the collapse and fighting within it apply.
In other games, the circle collapse can split into multiple circles, up to three in some cases. This can happen at any time in between the first and final two collapses.
When this happens, you should keep the following in mind:
1. Smaller Circles, More CQB
Split circles will inheritably be smaller than a “normal” circle collapse. Their size also depends on how early or late a circle split happens in the match.
Regardless of the exact size of these split circles, weapons that are better for end-game close-combat — SMGs especially — will typically have increased value.
Note any large buildings or clusters of smaller structures to sweep through while in one of these smaller circles, and mind any open spaces that can create mid- to long-range engagement opportunities.
2. Cross-Circle Engagements
While difficult, it is possible to engage with enemies in other circle collapses during a split collapse.
One strategy is for expert snipers: those who account for bullet drop and can roughly see through the hazy collapse can make out enemies in other circles. Especially when you are in a circle on high ground, such as at the Observatory, consider looking across the collapse and try to hit an unexpected elimination.
The other, though riskier, strategy is using a combination of Gas Masks and Stims to “will your way” between circles. In total desperation situations, like when a squad has you pinned up against the collapse itself, it may be worth burning those items to a potentially safer circle.
3. The Merge
Those who know about “rotating,” or positioning yourself toward the next circle, will need to account for all circles coming back together as one after a split collapse.
Individual circles will ultimately meet in the middle, Venn diagram style. Checking the larger Tac Map is crucial for planning next steps, as it is often best to be toward the direction of the future safe area to get ahead of the pack.

The Gulag has some new rules, starting with a new arena.
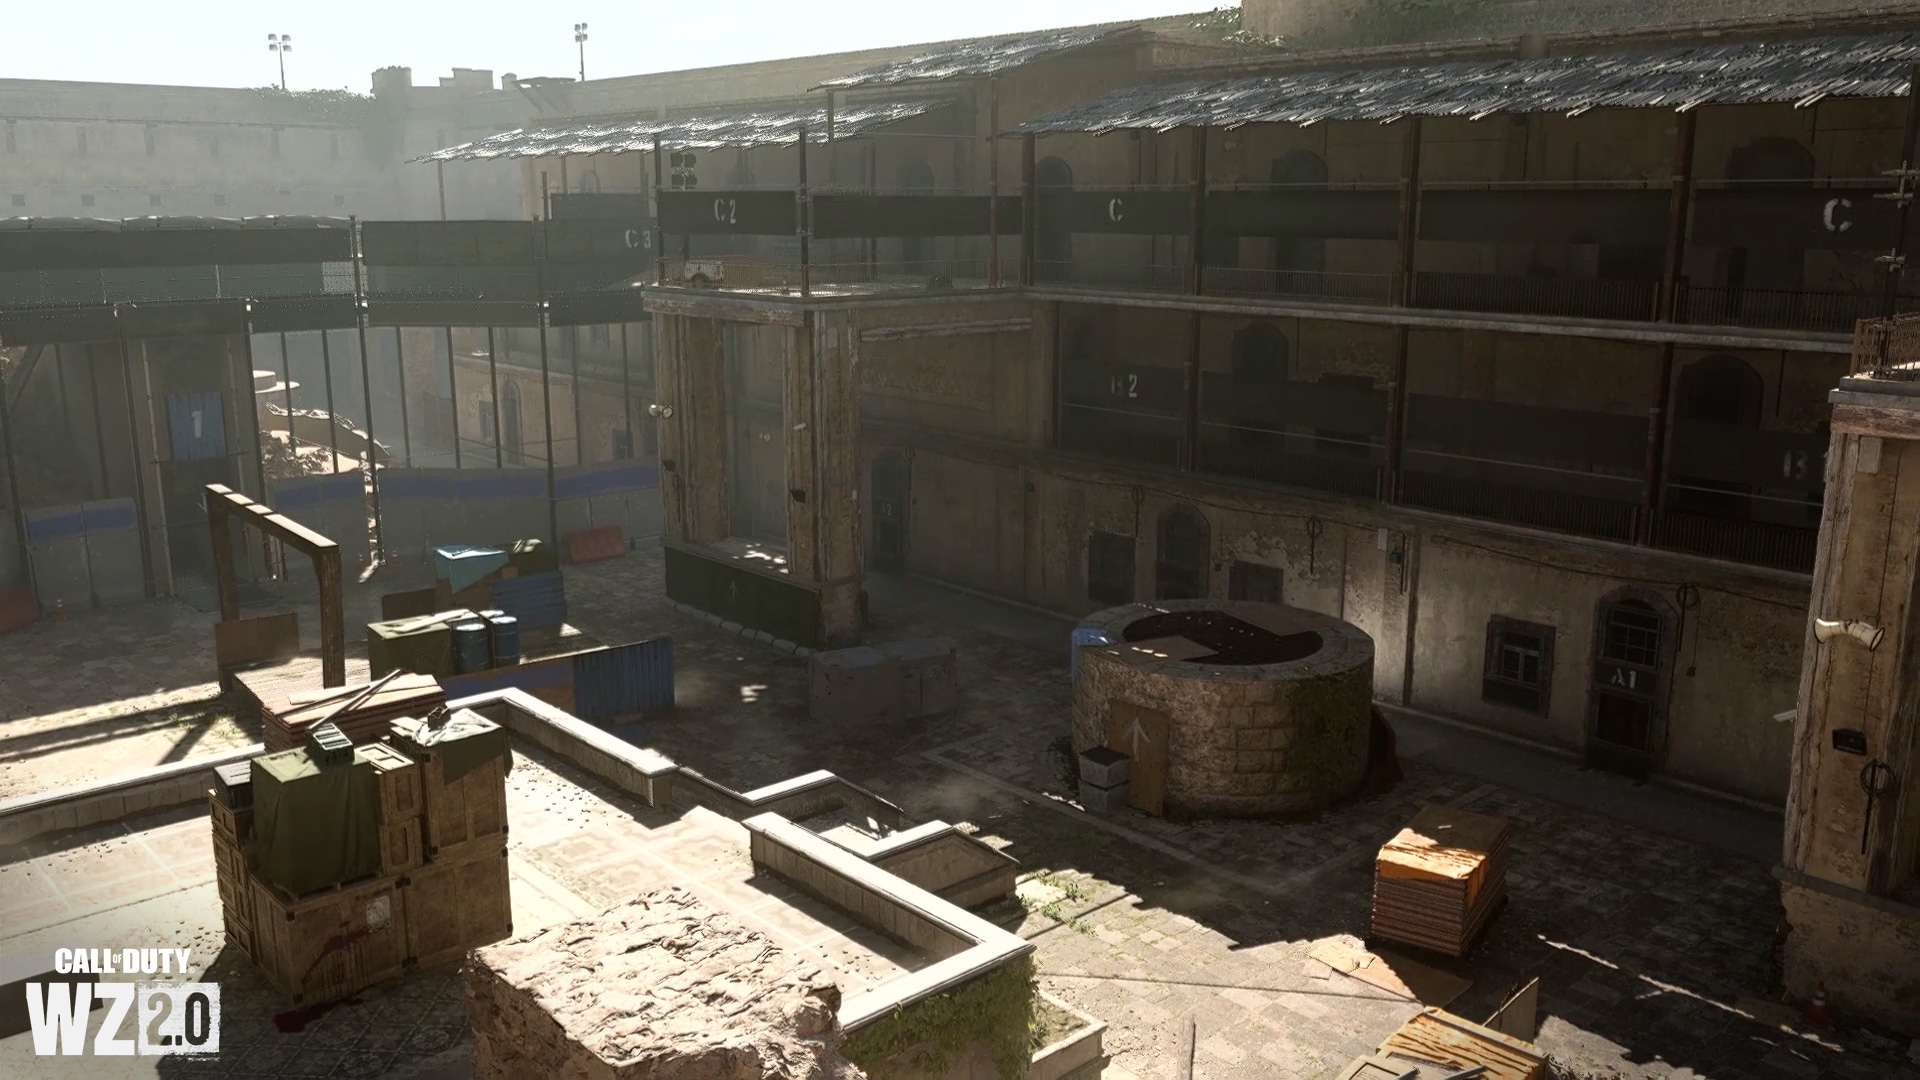
The new Gulag arena is a roughly symmetrical, small-scale arena meant for 2v2 combat. In between the two spawn areas is a raised courtyard on one wall and an open courtyard with a circular platform on the other. The middle lane is completely open, besides a set of gallows on one side and a platform on the other.
Operators who are sent to the Gulag — upon first death in a Battle Royale before the final circle collapses — will be randomly paired up with another fallen Operator. All players will receive a predefined Loadout — at launch, this will be a Pistol or Shotgun, a Lethal Grenade, and a Tactical Grenade — with highly effective weaponry and gear placed toward the center.
Within the Gulag, there is a Jailer who jumps down onto the circular platform during the duel. The Jailer has increased health compared to a normal Operator, as well as a Minigun, which takes a second to wind up before unleashing a storm of bullets. Eliminating the Jailer instead of the opposition returns all four Gulag entrants back into the game, while just eliminating the opposition just brings one duo back into the match.
In other words, if all four Operators want to survive, they can agree to a cease-fire and focus on eliminating the Jailer. Doing so may require Proximity Chat (more details later in the overview) and putting trust in the other Duo…
Otherwise, it’s business as usual: eliminate the opposition, and you will return to the match with the Gulag Loadout as a parting gift.

– The Ultimate Risk for Ultimate Rewards. Whether you infiltrate alone or squad up, there are no guarantees of keeping what you earned. Play your way to survive and build up a stocked arsenal, with the ultra-rare Weapons Crate as the ultimate prize.
– Choose Your Faction. The Legion, White Lotus, and Black Mous need Operators. Take on their missions to learn more about DMZ, stock up on items, and advance the intricate story of a volatile power struggle.
– Explore Al Mazrah. Contracts, World Events, and more await in this open world. The only hazards stopping you are enemy Operators, AI combatants, sandstorms, radiation . . . and the threat of being left behind when all exfil opportunities are gone.
– Explore. Loot. Extract. Play for keeps in the DMZ.

DMZ is an open-world, narrative-focused extraction mode where Operators have free rein to complete faction-based missions, take on additional side objectives, engage with enemy Operators or AI combatants, and search for valuable items, all while fighting to survive toward exfiltration.
Essentially, your goal in DMZ is to infiltrate Al Mazrah, collect valuable items while performing various tasks, and escape before dying or the time limit is reached.
Instead of dropping in from a plane, Operators are set to enter at random points around Al Mazrah. In theory, not every Operator will be completing the same tasks. While there are always faction missions to complete, there are also Contracts to find, events to encounter, and points of interest to explore. All of this is usually marked on the Tac Map.
For the benefit of your survival and success in this mode, your Operator has a Backpack. This holds everything from weapons and equipment to Cash and other valuables that can be used to buy items at the Shops. While in the DMZ, any found items — from containers, plucked off deceased soldiers, or loose in the world — must be manually placed in the Backpack.
At any time during the match, you have the option to exfiltrate. Do this by calling in a helicopter transport at specific marked locations on the map. After you use all marked exfil locations, a final exfil point is revealed — this is the last means of escape before the match is over and your escape becomes impossible, as Operators are presumed dead due to becoming MIA.
DMZ is a single-life game mode in which dying results in the loss of all nonpermanent items in your Backpack. Squadmates can perform revives to save your life, but ultimately, in every match you have the inherent risk of forever losing items earned in the mode.
Meet the Factions: Lore-Driven Guides to DMZ

Your main objective in DMZ — as well as the means to learn about this new experience — is to complete missions given to you by three factions. These missions are selected prior to each match and can be completed at your own pace.
Embroiled in a constant power struggle, these factions are constantly recruiting Operators to complete some of the most dangerous missions on offer in Warzone 2.0. They are as follows:
Legion
A private military contractor with conflicting reports about its ties to greater Western powers, the Legion is the first faction an Operator can accept jobs from, as they are desperate to gain a foothold in the global conflict. Soldiers who join the Legion are said to no longer exist on paper, and those who contract them are afforded enough plausible deniability to order any missions that would otherwise be considered acts of war.
Just like you, the Legion is curious about what the DMZ holds. What can be gained and extracted from this new battleground? And who exactly are the threats that want to maintain control of Al Mazrah?
While assisting the Legion, you may realize what power can do to those not ready to wield it.
White Lotus
After successfully completing multiple missions for the Legion, you will eventually learn about DMZ’s second faction, one fighting on its heels to regain silent dominance over the region.
For years, White Lotus used Al Mazrah’s abundance of natural resources to help fuel its benefactors, who are rapidly expanding their public infrastructure projects both within and beyond its borders. However, attrition from Al Qatala and other factions have significantly reduced their presence .
In assisting the White Lotus, you may eventually help them retake their original operations base, which could ultimately reestablish the control they once had over the DMZ.
Black Mous
This third faction comes online only after you complete multiple missions for both the Legion and White Lotus, as they hold knowledge as the ultimate form of power.
An anonymous, decentralized group, Black Mous has a shadow presence over the DMZ. Despite a lack of known leadership, the group is built on three key tenets: do not talk about the Black Mous, do not reveal your personal identity, and do not attack the defenseless.
Their missions are grounded in espionage and cyberwarfare, using technology found in the DMZ to have total reconnaissance.
Contracts, World Activities, and Assimilation

The three factions offer plenty of missions to tackle in DMZ, but those searching for more action are also free to do the following during any infiltration:
Contracts
Just like in Battle Royale, DMZ contains quick-completion objectives that can be accepted in-match for Cash and other rewards. While these Contracts share the same icons as their Battle Royale counterparts, their objectives are different.
Here are some of the DMZ Contracts on offer (and the Tac Map icon for each):
– Secure Intel / Geiger Search (Magnifying Glass): Find intel on hard drives; then go to the nearest radio tower to upload its data. Alternatively, it may task you to collect Uranium rods found with a Geiger Counter.
– Elimination (Crosshair): Assassinate an AI target guarded by multiple combatants, or at least confirm their death.
– Hostage (Handcuffs): Rescue a hostage within a locked building; then carry them to the nearest helicopter exfil location.
– Cargo Delivery / Shipment (Briefcase): Depending on the specific Contract, find a vehicle or boat with precious cargo for a drop-off at a marked location. Feel free to keep the vehicle after the drop-off!
– Hunt (Skull): Hunt an enemy Operator team marked as high-value targets (HVTs), due to their activity within the DMZ match.
– Destroy Supplies (Bomb): Locate and destroy two supply sites with planted bombs.
World Activities
Other icons on DMZ’s Tac Map indicate additional side objectives:
– Safes: These contain tons of Cash but take time to crack open. The drill you need to use to open a Safe attracts AI combatants and is loud enough to draw the attention of other Operators as well.
– SAM Sites: These anti-air turrets can shoot down planes carrying precious cargo; activate them to potentially send a Supply Box containing valuable items crashing down.
– UAV Towers: Find these around Al Mazrah to receive intel on AI combatant and Operator locations via the minimap.
– Hidden Caches: Obviously not marked on the map, learn where these are likely to be found for consistent valuable item drops.
– Strongholds: These also exist in Battle Royale; skip down to the Strongholds overview for more details.
Occasionally, parts of Al Mazrah may be under the effects of two conditions:
– Sandstorms: As a desert city, these conditions can kick up at any time, reducing visibility and damaging Operators over time. If one hits, evacuate the area ASAP.
– Radiation: Not much is known about its origins, but this deadly condition can poison Operators. Iodine Pills, a new Field Upgrade, can be found to counteract its effects.
Fighting Other Operators and Assimilation
While DMZ focuses mainly on eliminating AI combatants, you may also encounter other Operators during your travels across Al Mazrah.
You are free to engage or avoid these other squads as you see fit. In squad-based DMZ matches (such as Trios at launch), there is also the option to assimilate with other squads instead of fighting them. Though you might be initially reticent to partner with rival Operators, through Proximity Chat and a calm head, you can try to foster a temporary alliance. You may be glad you did, as this is incredibly useful:
First, if all Operators are trying to complete the same faction mission, they may want to party up and tackle it together. Alternatively, if one group is newer to DMZ and can convince a more experienced party to help them out, that could help them survive in a match longer. Or, in situations where two squads are in a heated battle, they can ultimately decide to save their ammo, assimilate, and revive each other before soldiering on.
Also, after assimilating, Operators cannot pull a General Shepherd and cut loose ends — friendly fire is disabled on temporary squadmates.
The Backpack: Looting and Storage

As opposed to simplified pickup mechanics and a smaller Loadout system in Warzone 2.0’s Battle Royale, DMZ item gathering involves storage management in a large Backpack, which is brought into and out of matches to carry weapons, equipment, valuables, and more.
Looting
In DMZ, you can carry the following items in a Loadout:
– Two weapons with their maximum amount of ammo
– Two equipment pieces
– A Field Upgrade and Killstreak
– Armor Plates and Gas Mask
Everything else — such as Cash, additional ammo, weapons and equipment, and valuables — is stored in the Backpack.
Each item picked up in DMZ that is over the Loadout capacity is automatically placed into the Backpack. If the item is within a container (e.g., a medical supply case, a dead Operator’s pack, or a weapons cache), you must individually select items from that container to place within the Backpack.
If at any time you wish to drop something within the Backpack, it must be individually selected and dropped. The same applies for swapping inactive Loadout items, like equipment or Field Upgrades, with ones in your Loadout.
Carrying around different types of Loadout Items is incredibly helpful for adapting to the DMZ. For example, keeping a spare Heartbeat Sensor in the Backpack is helpful for traveling through Strongholds where multiple combatants and Operators can be present. Or, if you’re about to go across a wide-open stretch of desert, you can stash a Shotgun in the Backpack and swap to a long-range Rifle.
Every item, including Loadout items like weapons, also has a Cash value associated with it. Exchange these items at Buy Stations for Cash to use for missions or other items.
Storage and Item Permanence
Anything you extract from the DMZ — Cash, weapons, and other items — are kept in Storage, which you can access at any time between matches in the prematch lobby.
You are free to take anything from Storage and put it into the Backpack or active Loadout for the next infiltration.
The Storage system incentivizes Operators who can exfil with as many items as possible, especially Contraband Weapons.
Weapons: Contraband and Blueprints

Contraband Weapons
Found across DMZ, Contraband Weapons are the primary means of defense and are the main items permanently lost in the DMZ upon death.
Any weapon found within DMZ is considered a Contraband Weapon. This includes weapons found on Operators or combatants, or loose in the world or within containers.
Contraband Weapons can contain anywhere from zero to five attachments, and may not be the most effective version of that weapon possible. For more potent armaments, consider obtaining Weapon Blueprints.
Weapon Blueprints
Other than Contraband, you also have access to Weapon Blueprints in DMZ.
Weapon Blueprints have a unique property; they are not permanently lost upon death. Instead, dying in DMZ with a Weapon Blueprint on your person makes the Blueprint inaccessible for a period of time, usually a few hours.
Functional Weapons
In DMZ, extracting with any Contraband weapon unlocks it across all other game modes.
This includes the M13B Assault Rife, a new free functional weapon earned by defeating [[REDACTED]].
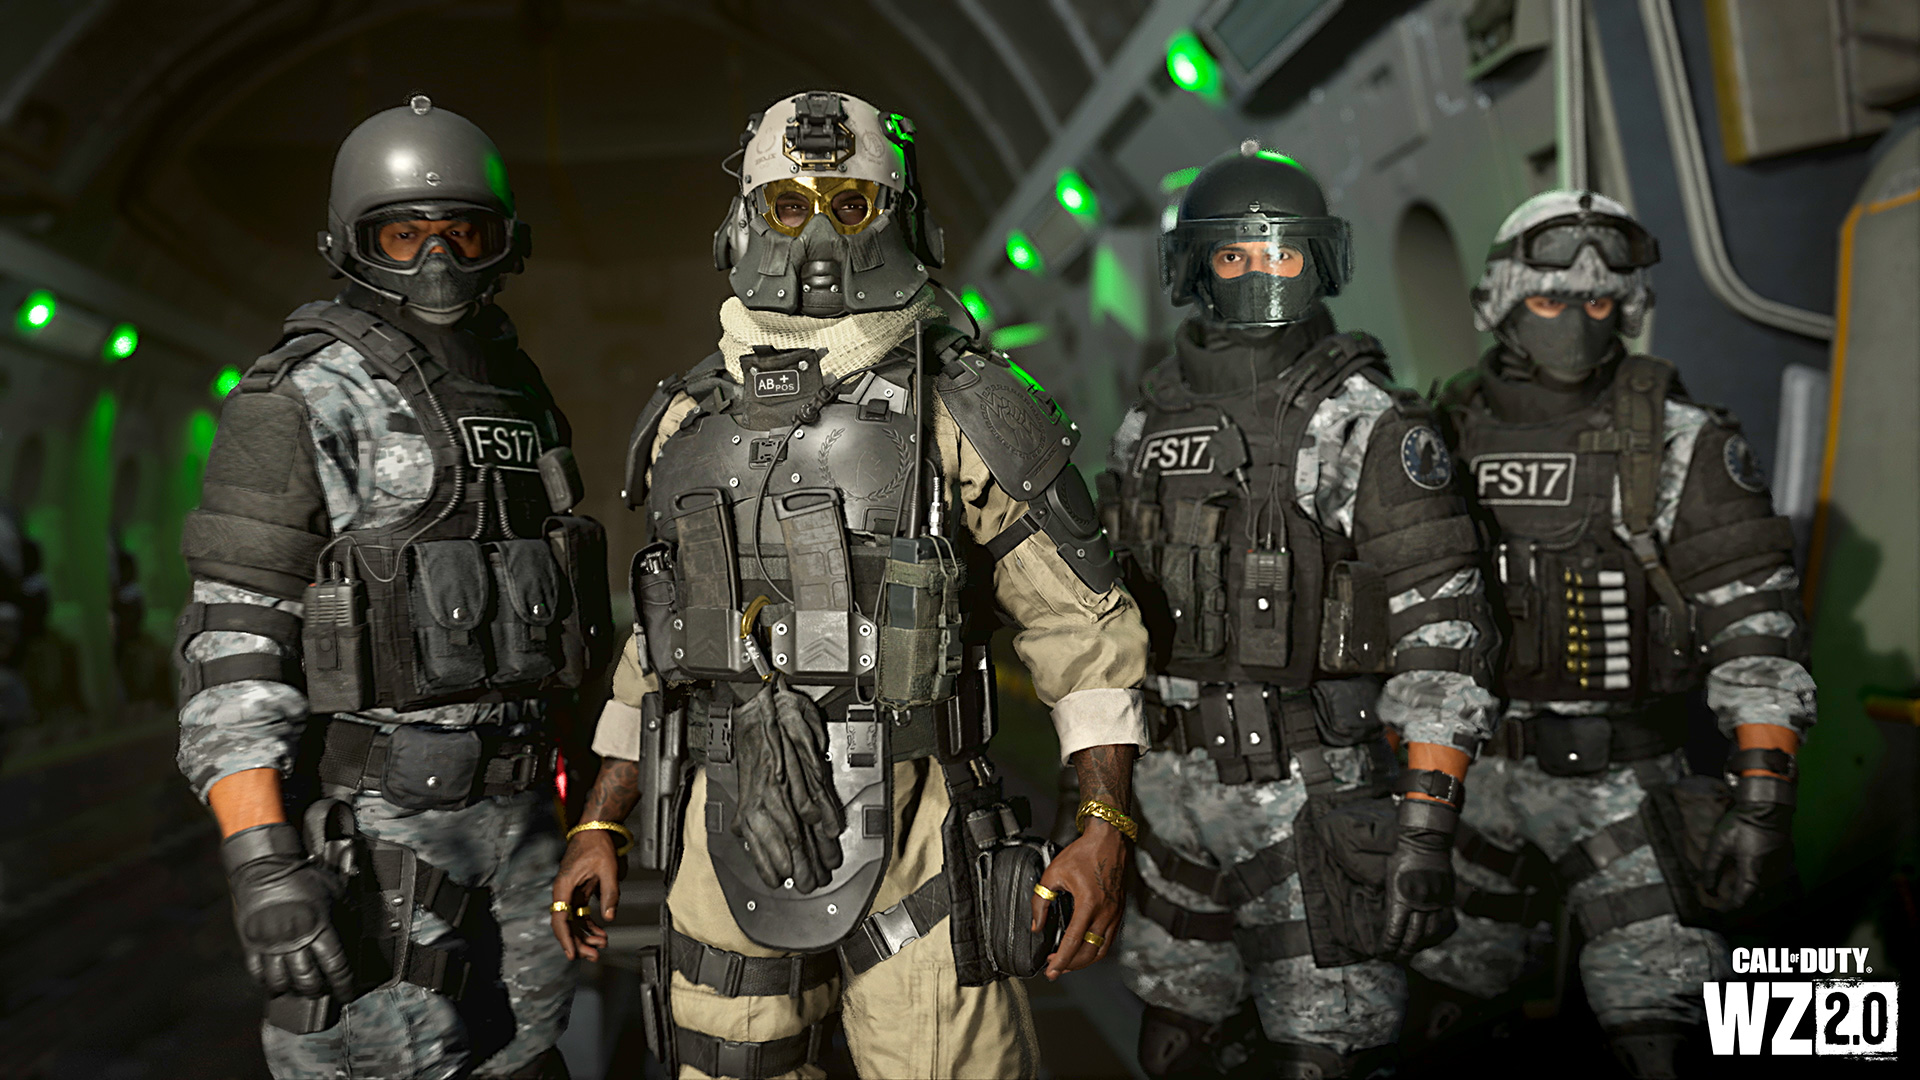
The endgame for every DMZ match is the same: get out or get dropped.
Exfil
Exfil locations are the only sure way out of Al Mazrah in DMZ.
After you manually activate an extraction point by calling in an exfil helicopter, the point will be marked on the Tac Map for all other squads. At the same time, AI combatants will begin to swarm the area to prevent your escape.
Survive this onslaught, and you will be able to leave the match safely. Otherwise, another squad is sure to use the helicopter that was conveniently called in.
There are a finite number of exfil points in a DMZ match. After all are used, a final site will be marked. Just like any other site, an exfil helicopter must be called in by a team and it’s very likely to be swarmed by combatants. However, it will remain in the area for a short duration before it leaves all remaining Operators to be listed as MIA.
The Hostage Rescue contract also offers the ability to exfil after successfully delivering the hostages.
Death
As mentioned, anything in your Backpack is lost upon death, except for Weapon Blueprints. In Solo modes, there is zero safety net; if you go down, those Backpack contents are gone. In squad-based modes, however, there are two opportunities to stay alive:
The first is via downed revive, which Call of Duty®: Warzone™ players should already be familiar with; Operators will enter a downed state and can be picked up to stay alive. Secondly, if a friendly player is KIA, they can still be revived at the spot of their death, although this process will take longer than a downed revive.
Naturally, this is just the start of your DMZ experience. Expect continuous updates to this mode as the Modern Warfare II Seasons progress.

– Sweep Out Strongholds, Black Sites. AI combatants are found in these marked buildings around Al Mazrah. Clear them out for in-match items, Loadouts, and permanent rewards.
– Vehicles Rebuilt. From new modes of transportation to techniques and a fuel system, take those boots off the ground and use these machines to help drive the squad to victory.
– Proximity Chat, Aquatic Combat Offer New Strategies. One is built for stealth, the other for social deception. Use them to craft new paths to victory.
Looking for Party and Ping Features

Find players who match your playstyle and communicate using an expanded in-match Ping system, available in both Modern Warfare II and Warzone 2.0.
Looking for Party
To access Looking for Party, click “Find A Party.” After selecting a mode and entering the lobby, find your party based on preferences, and drop into the match.
Expanded from the previous Warzone, this feature now includes the following preference filters:
- In-Game Communication Style: Voice Chat, Text Chat, Ping
- Main Language: Select up to 3 language preferences
- Playstyle (Primary, Secondary): Competitive, Casual, Objectives, High Kills
This system will be available in Battle Royale modes, as well as in Featured Multiplayer modes during Season 01.
In-Match Ping System
Another expanded feature, the Ping system will include a Tactical Ping Wheel.
In Battle Royale and DMZ, you can hold the Ping command to communicate eight options via custom visuals and voice lines: a General Ping, Attacking Here, Watching Here, Looting Here, Regrouping Here, Stay Quiet, I Need Help, and Assimilation related. In all other modes, this wheel is streamlined to feature Going Here, Stay Quiet, Watching Here, and I Need Help commands.
Other improvements, such as Pinging in the HUD, were also made over lessons learned the past three years.
Both Battle Royale and DMZ matches will have proximity chat — also known as the ability to have voice conversations with anyone nearby — enabled.
Using this effectively depends on the mode:
In DMZ, Proximity Chat is crucial to ensuring an Assimilation goes as planned. Alternatively, it can be used as a de-escalation tactic for players who just want to complete their objectives and get out.
In Battle Royale, Proximity Chat is most useful in the Gulag, where you have a random squadmate to form a Duo. There is enough distance between the two Duos to quickly discuss strategy before the Gulag duel begins, so it is recommended that you open up comms for that.
Also, keep in mind that anti-toxicity rules will be enforced, so keep those comms clean. More details can be found here.

Another concept across both modes at launch is the presence of Strongholds and their more elite variant, the Black Site.
At the end of the first circle collapse in Battle Royale matches, three Strongholds are activated around the map and do not require a key for access. At the beginning of a DMZ match, several Strongholds will become accessible by finding a key somewhere around the map. In both modes, they are marked with large green castle icons and contain AI combatants.
In Battle Royale, the first team to reach a Stronghold must defuse a bomb before time expires. Otherwise, the objective is to clear a specific amount of enemies; both AI Combatants and rival Operators count. This is also the default objective in DMZ.
Once inside, Operators are free to take any items after clearing threats, which can include enemy Operator squads who can enter at any time. Completing a Stronghold in Battle Royale also offers a Loadout Crate and a temporary UAV effect of the surrounding area.
Black Sites, available only in Battle Royale, are a more dangerous form of Strongholds. This requires a key (Black Site Key) to access, which is given to the first Operator or squad that clears a Stronghold.
The Black Site is marked with a skull icon and contains considerably tougher enemies, including a unique Juggernaut boss. The reward for completing a Black Site is great: first, a permanent Weapon Blueprint is immediately rewarded for use in all modes. During the match itself, Operators also get tons of Legendary items, as well as a permanent UAV of the area surrounding the Black Site until it is in the circle collapse.
While the above is not necessary for success in either mode, it can certainly help you and the squad stock up on supplies and intel.
Vehicles: Roster, Techniques, and Fuel
Vehicular combat gets a serious upgrade in Warzone 2.0. To start, here’s a look at all the modes of transportation in the game:
Roster
ATV

Capacity: 1 Driver, 2 Passengers + Additional “Hop-Ons”
Damage Rating: Low
Take charge with rough and ready capability delivered with plenty of low-rpm torque and power. Top-tier rack capacity offers an impressive payload capacity: hold ’er wide and send it.
UTV
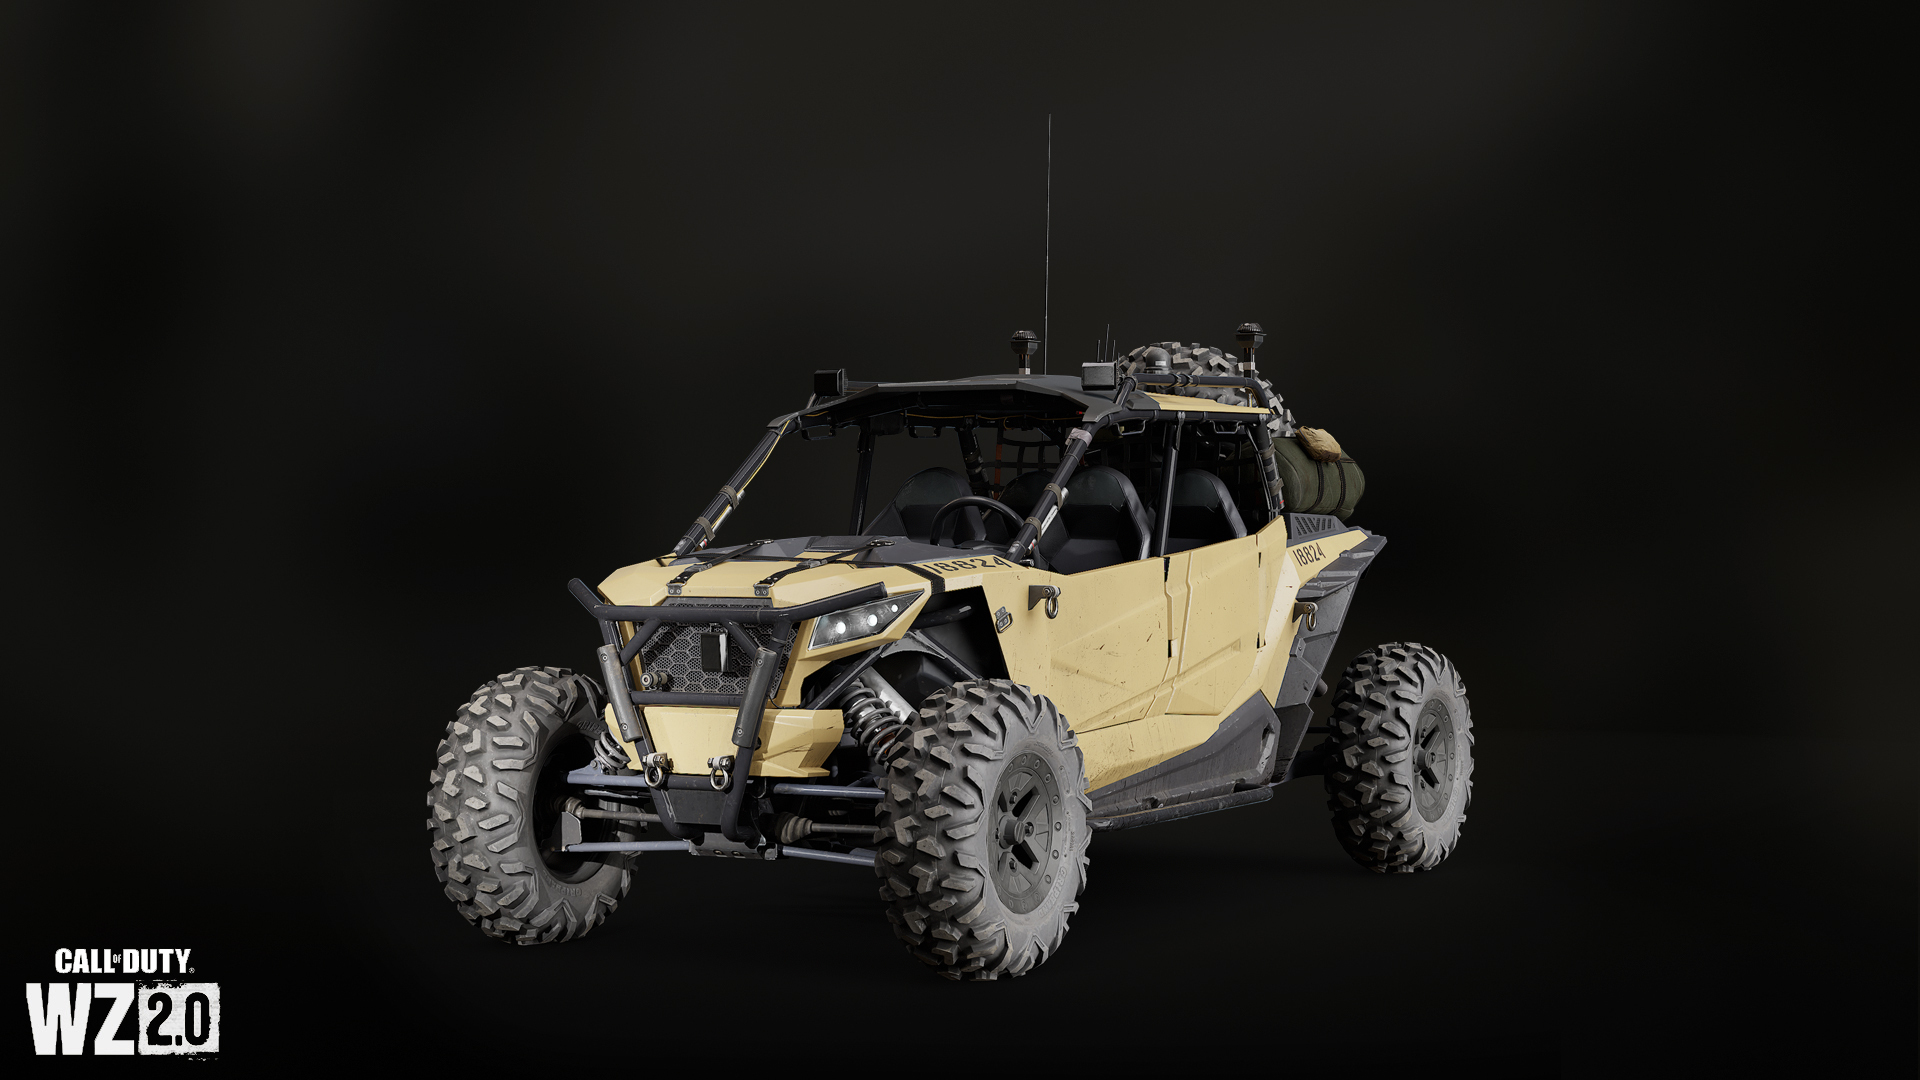
Capacity: 1 Driver, 3 Passengers
Damage Rating: Low
The pinnacle of ultralight tactical off-road vehicles, allowing for rapid personnel deployment for squads of up to four. Go deep and hard in the most rugged and austere environments with world-class mobility and versatility.
Hatchback
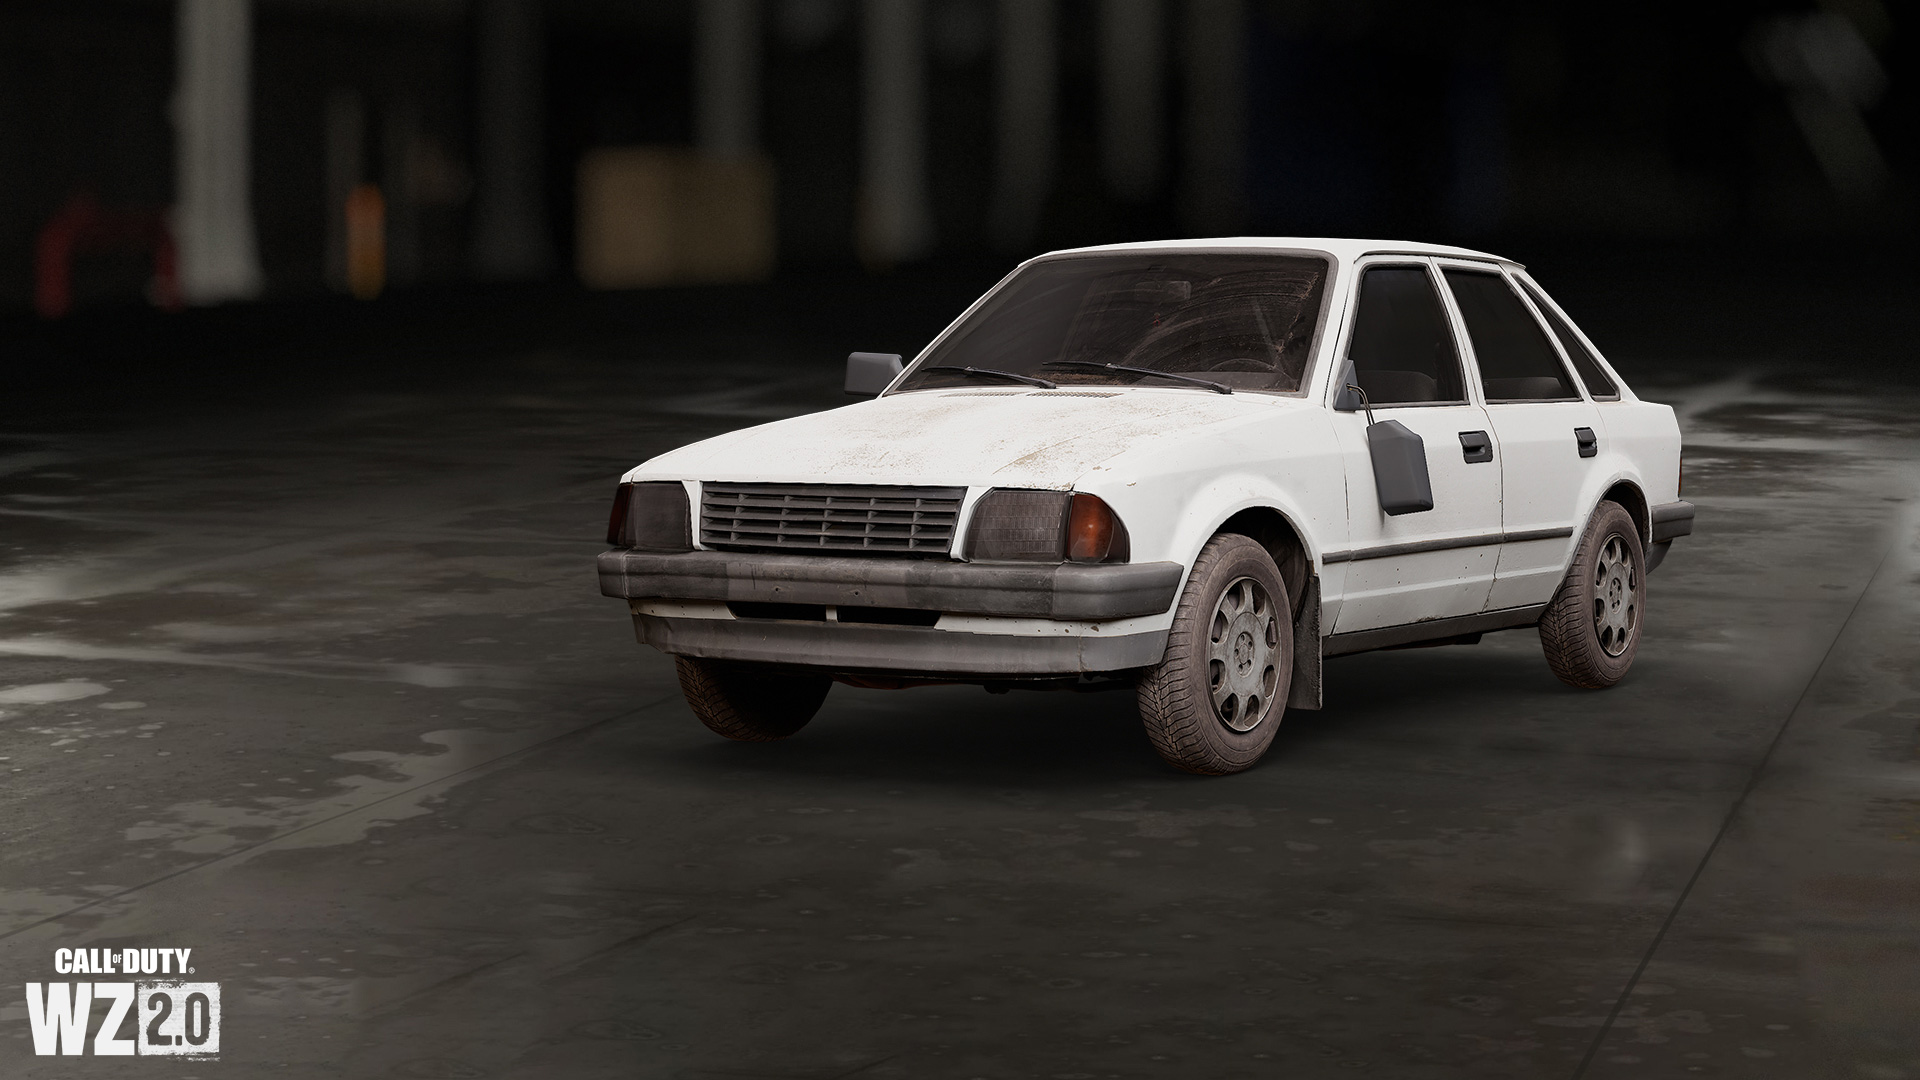
Capacity: 1 Driver, 3 Passengers
Damage Rating: Medium
A four-door civilian hatchback without armor plating or any significant protections.
Chop Top
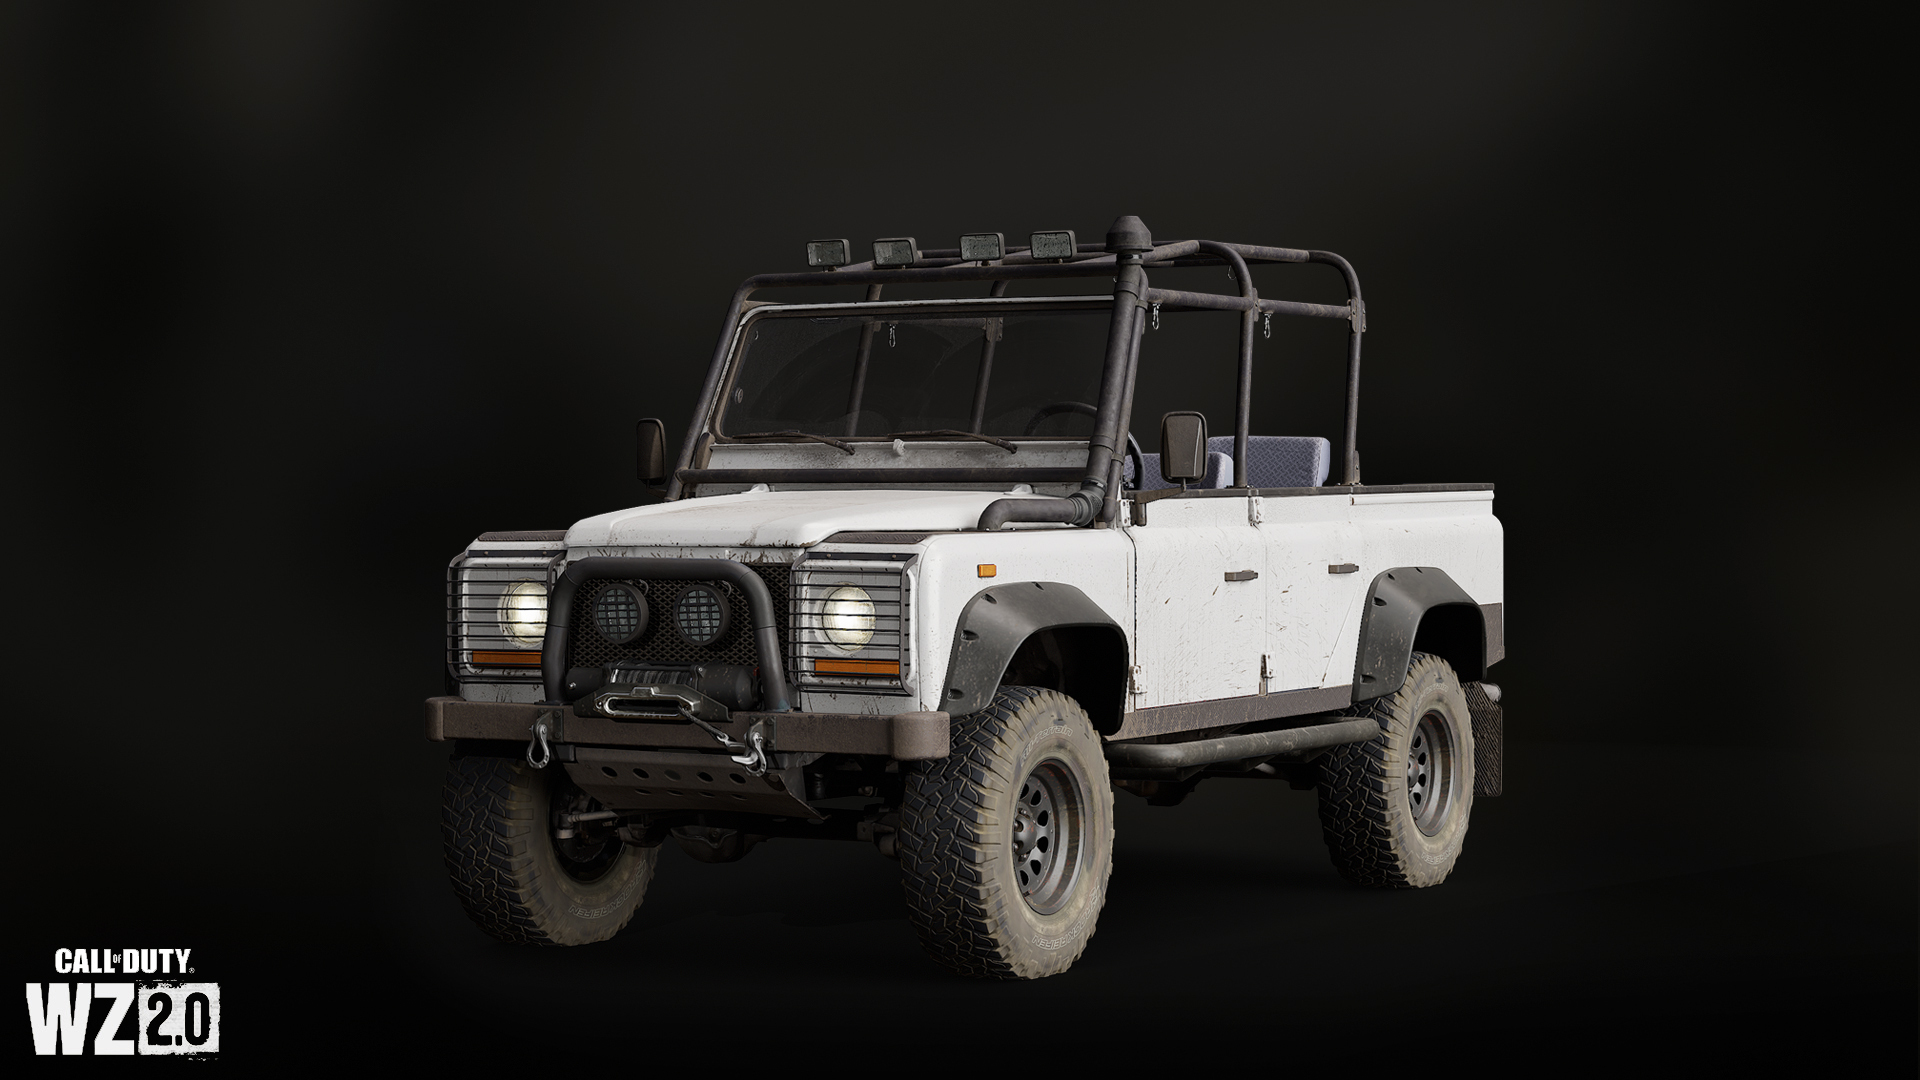
Capacity: 1 Driver, 3 Passengers
Damage Rating: Low-Medium
This open-air, off-road vehicle provides little protection but can be used for rapid movement between objectives.
SUV
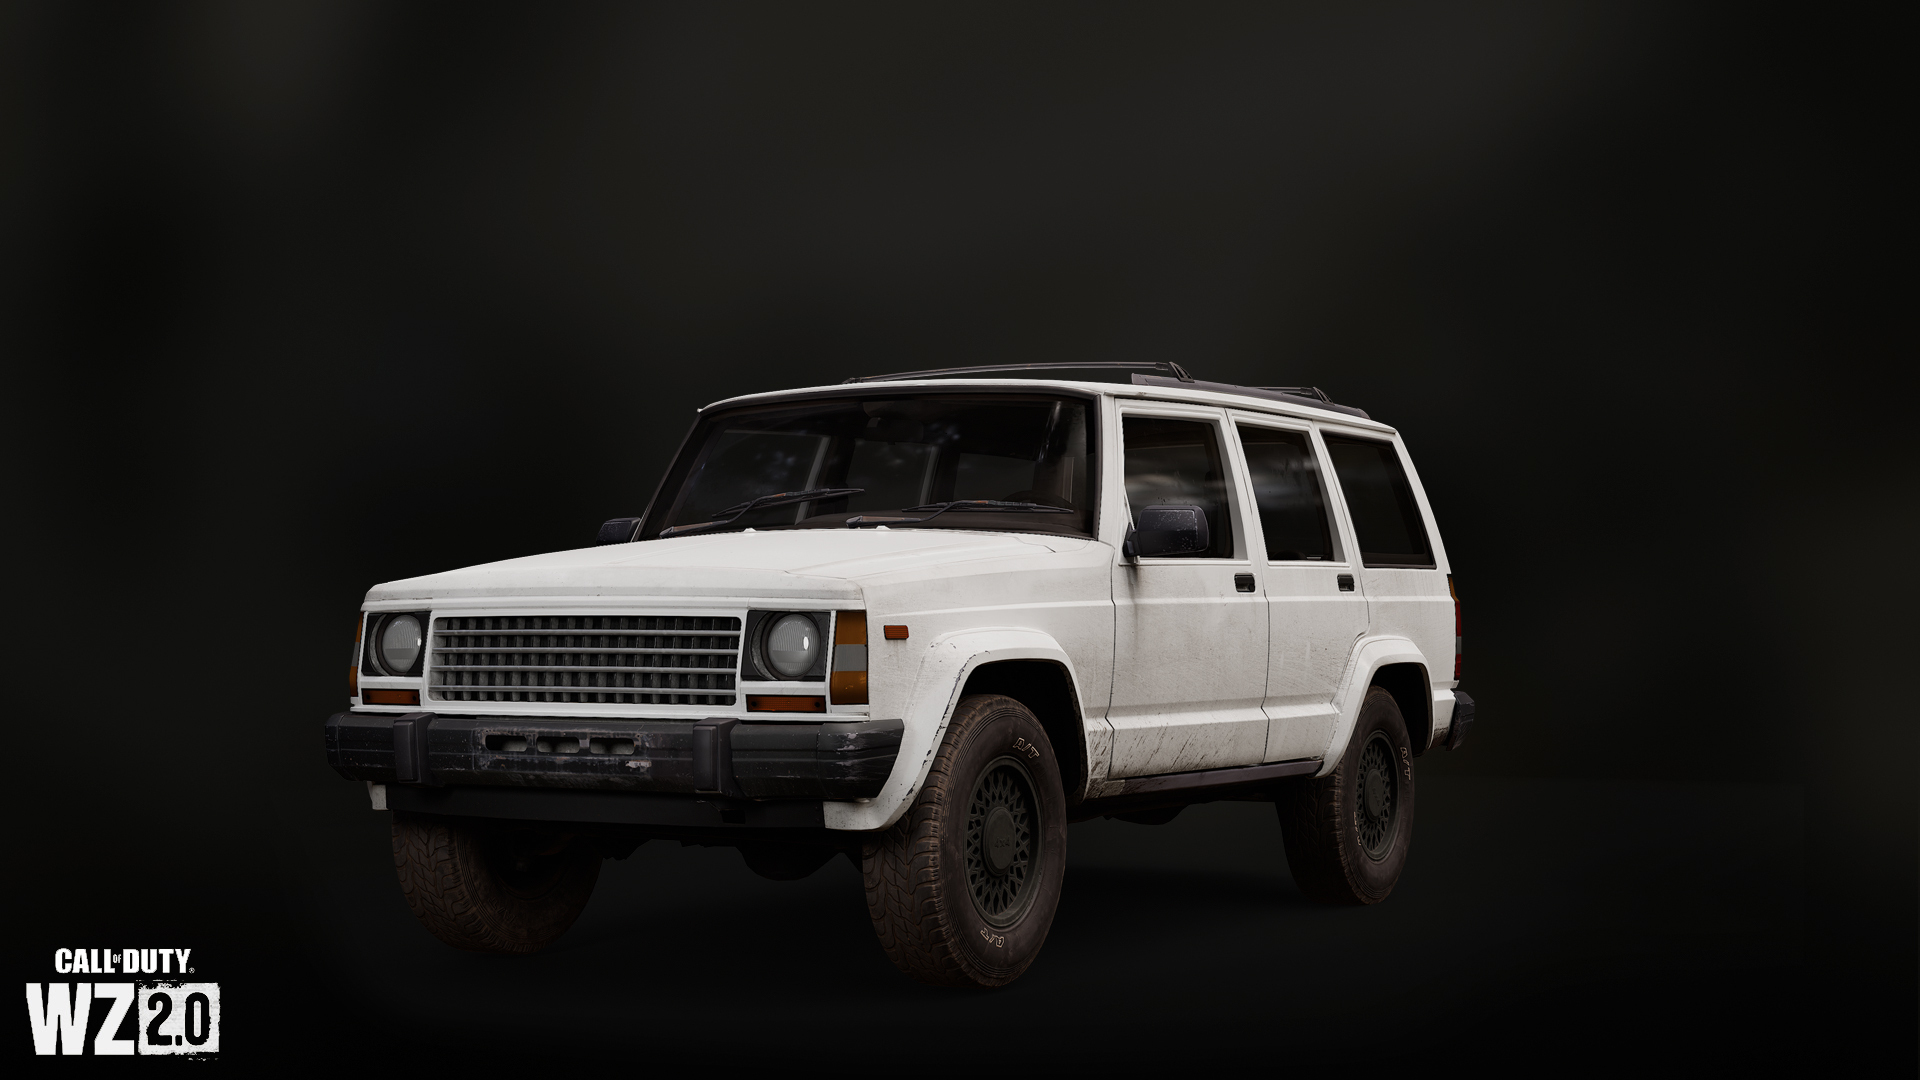
Capacity: 1 Driver, 3–4 Passengers
Damage Rating: Medium
An all-terrain civilian 4×4 that can be used for quick extraction or infiltration in battle.
Hummer EV
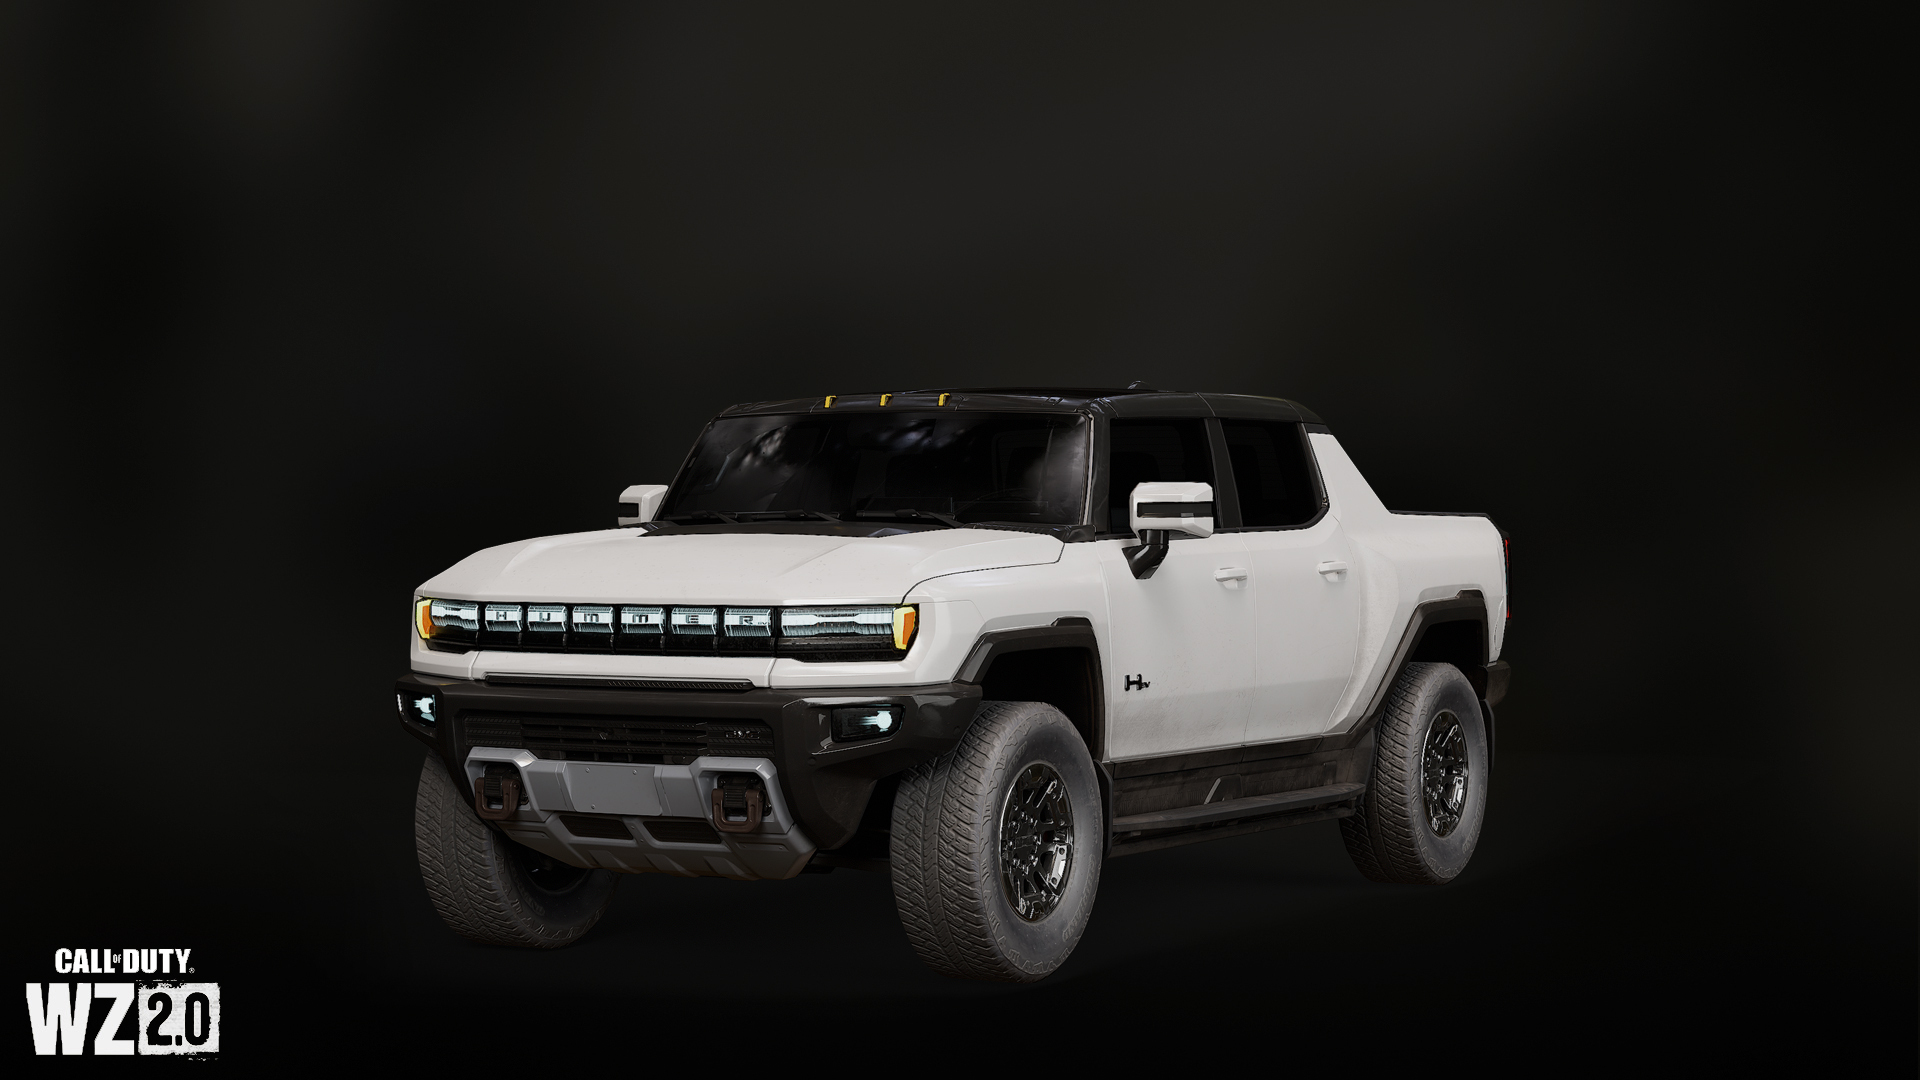
Capacity: 1 Driver, 4 Passengers
Damage Rating: Medium
Incredibly quiet and quick, the GMC Hummer EV Pickup can transport up to 4 squad members through the toughest battlefields.
Tactical Vehicle (TAC-V)

Capacity: 1 Driver, 3 Passengers
Damage Rating: Medium-High
A specialized light combat vehicle with (or without) a mounted .50 Cal machine gun designed to handle extreme terrain and unconventional combat.
Cargo Truck

Capacity: 1 Driver, 1 Indoor Passenger + Flat Bed — as many passengers and vehicles that can fit
Damage Rating: Medium-High
A large industrial vehicle. Slow moving, but may provide a small amount of protection in firefights.
Light Helo

Capacity: 1 Pilot, 4 Passengers
Damage Rating: Medium-High
A twin-engine light helicopter for combat support and rapid traversal of the engagement zone.
Heavy Chopper

Capacity: 1 Pilot, Cargo Bay — as many passengers and vehicles that can fit
Damage Rating: High
A heavily armored search and rescue helicopter. Can transport troops to the combat zone and deploy flares when targeted by anti-aircraft ordnance.
RHIB
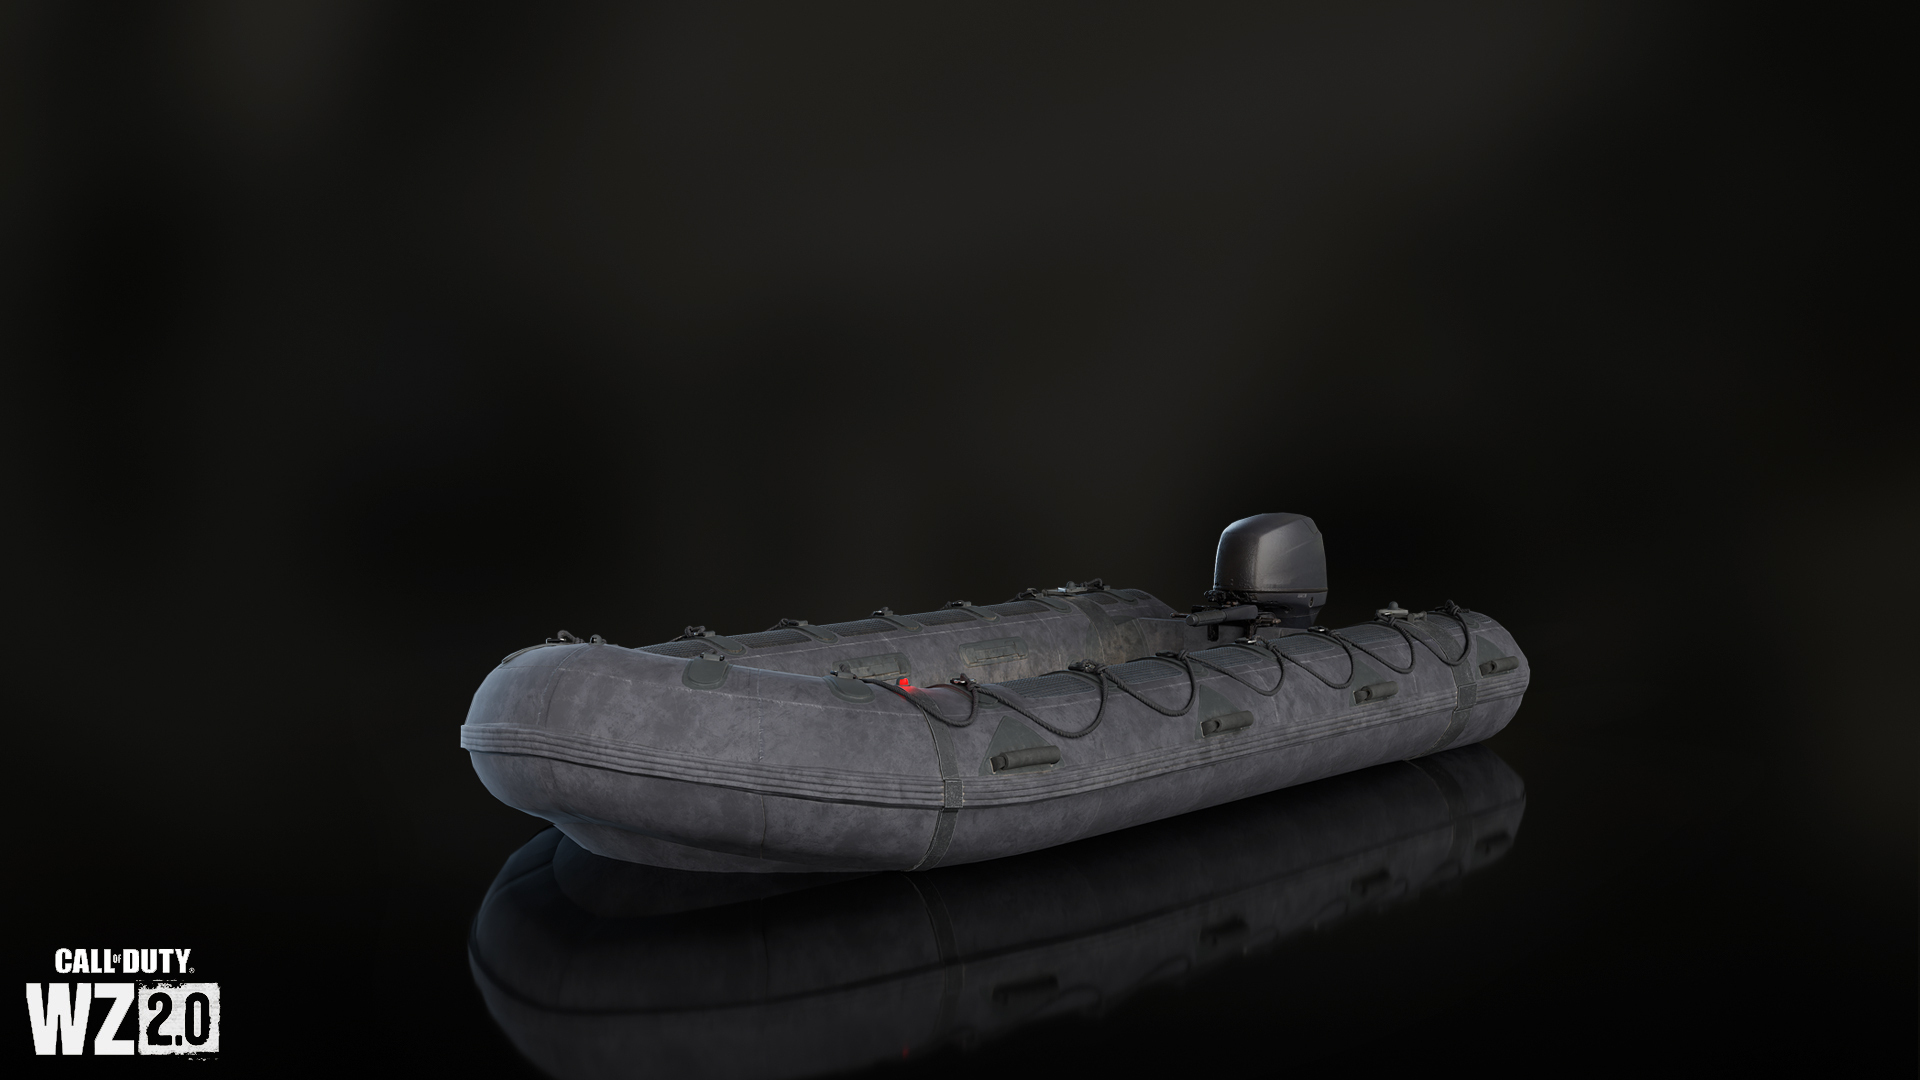
Capacity: 1 Captain, 3 Seated Passengers + Flat Body — as many passengers that can fit
Damage Rating: Low-Medium
A maneuverable tactical boat designed for Special Forces.
Armored Patrol Boat

Capacity: 1 Captain, 2 Passengers/Exposed .50 Cal Gunner + Flat Body — as many passengers that can fit
Damage Rating: High
An armored patrol boat complete with mounted .50 Cal Machine Guns.
Vehicular Techniques

As Modern Warfare II players can attest, you can do more with vehicles than just drive them across the map. Here are a few example strategies:
Got ’em Leaning: New to Modern Warfare II, passengers in contained vehicles, such as a hatchback or SUV, can lean out the window to fire their weapons. This is helpful for getting a better angle on the action in front of or behind a vehicle.
Seat-Swapping: A more advanced strategy with vehicles involves swapping seats. Those who can quickly swap to a passenger seat will make the vehicle coast for a few seconds, allowing you to heal using a Stim, throw on an Armor Plate, or potentially pick up a kill. Alternatively, switching sweats often as a passenger can throw off enemy fire.
Get on Up: Want an even riskier maneuver? You can also now climb onto the roof of some ground vehicles from the passenger or driver seat. This is great for bailing out quickly or when you want to jump on an enemy vehicle for a unique engagement starter.
There Goes a Tire!: Vehicles also have more realistic damage in Modern Warfare II compared to previous games. Try shooting out the tires of an enemy vehicle to make it harder to control, or blow off the doors to make it easier to target enemies inside.
Fuel and Health
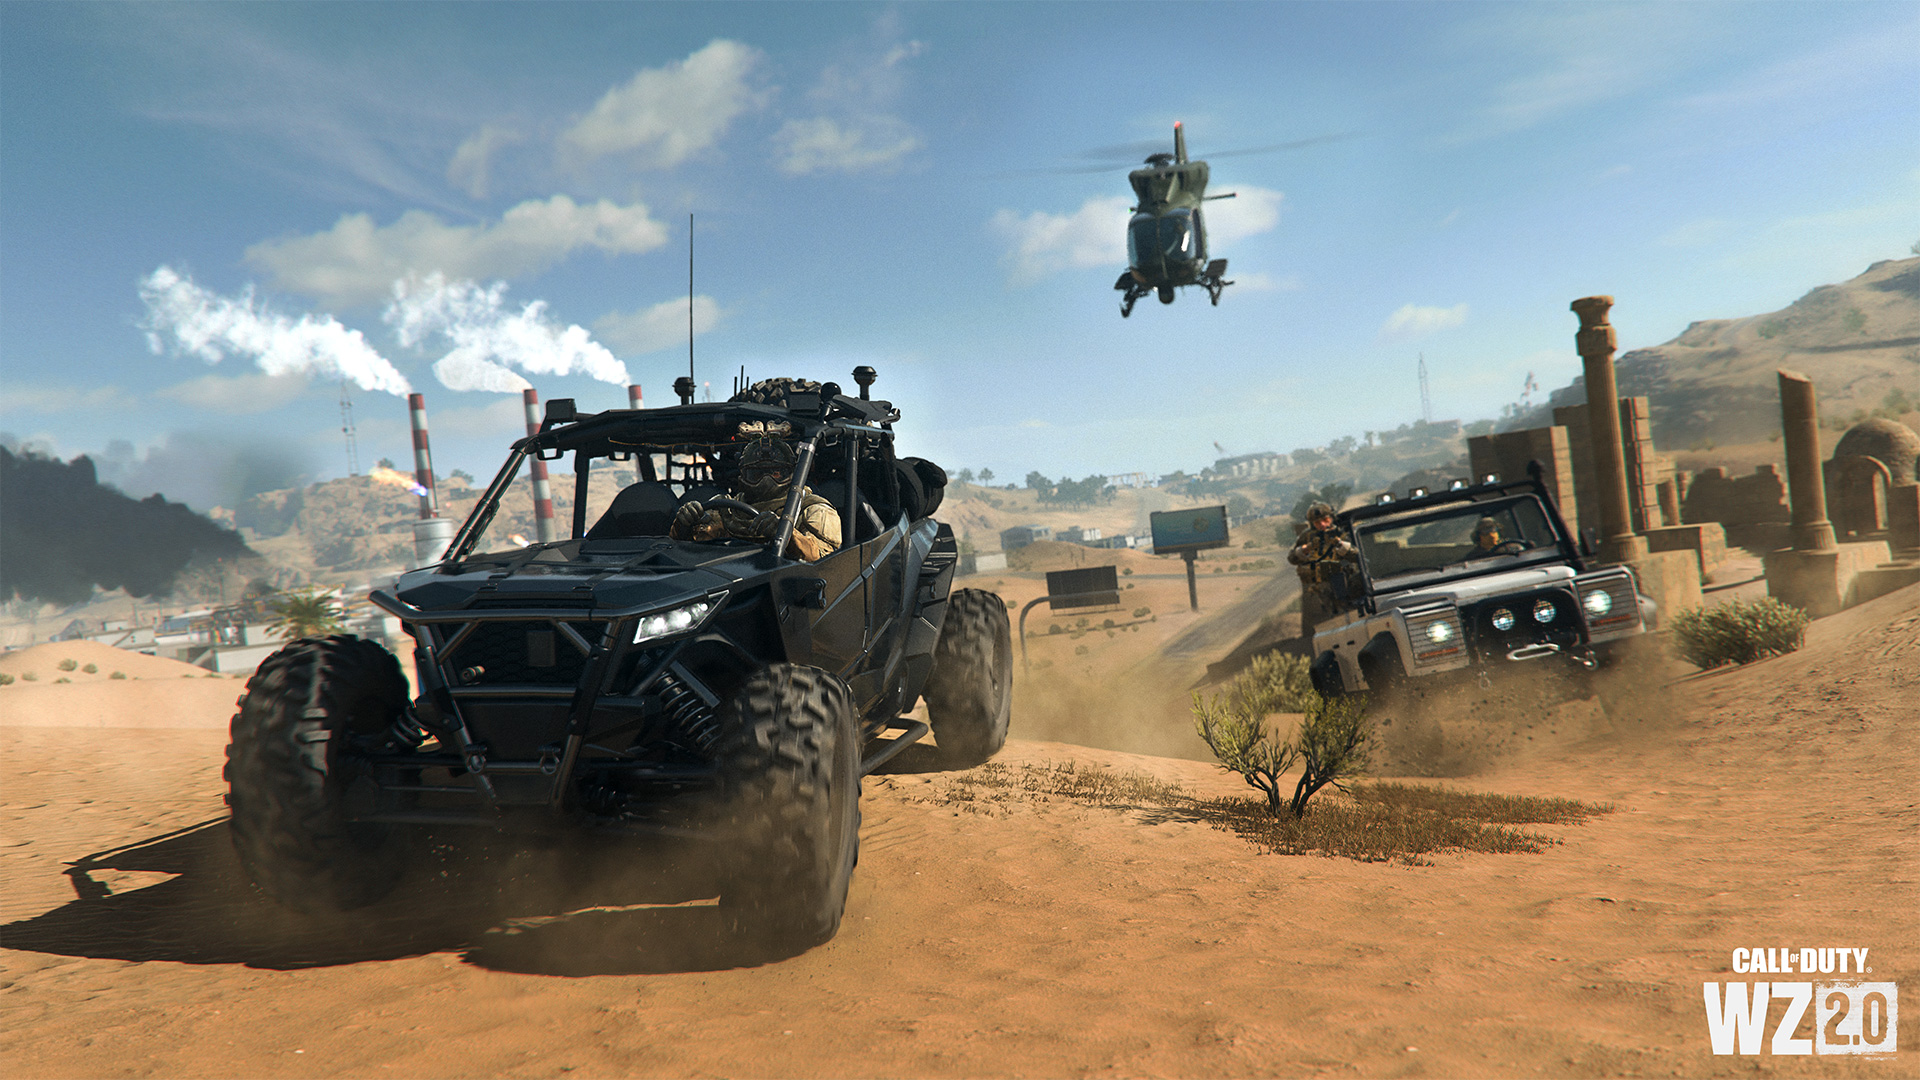
There are two other key additions to vehicles — fuel and the ability to repair vehicle damage.
Fuel appears as a meter alongside the vehicle’s damage and passenger counter at the bottom of the HUD.
No need to worry about the cost at the pump — fuel can be refilled either with Gas Cans found around the map or at Gas Stations. Once a vehicle runs out of fuel, it no longer works, so plan trips accordingly.
The other new feature is the ability to repair vehicle damage. For land vehicles, tire damage can be fixed by manually interacting with each tire to replace it. All vehicles can also visit Gas Stations to have body damage and tires, if applicable, recovered over time.
Managing these two features will be key to survival in both modes, whether it is outrunning a circle collapse in a Battle Royale or having a better means of attacking in DMZ. All those previous strategies involving Trophy Systems and “rigging” vehicles with explosives still apply, however, so veteran drivers should use both old and new tricks to keep their squad moving toward victory.

The Buy Station is an interactable space where you can purchase items (or sell them, in DMZ) using Cash. The Buy Station has a few similar offerings between modes, as well as a unique offering in DMZ and Battle Royale:
– Available Gear: Gas Masks, Killstreaks, Armor, and more; this is the Buy Station content of old with a twist. There is a limited quantity of items that can be bought at each Shop before it runs out for the match, and the item list may not be the same for each Shop.
– Buy Weapon: Custom Weapons, created for Custom Loadouts in Battle Royale, can be purchased for a considerable fee.
– Teammate Buy Back (BR Only): As in the original Warzone, squadmates can buy back their fallen allies, including those who lose in the Gulag.
– Sell (DMZ Only): From valuables like hard drives and gold bars to weapons and equipment, the Shops will happily give out Cash for anything in your Backpack.

Whether by boat or breaststroke, Operators can navigate waterways, rivers, and the open sea as part of their overall victory strategy.
In Al Mazrah, the largest bodies of water are as follows, as shown in the map guide:
– The southern sea, which stretches from the edge of the Al Safra Quarry, past the Sa’id City Port, and around Sawah Village, Sariff Bay, Al Bagra Fortress, and Al Malik Airport.
– All these areas have substantial flooding: Sawah Village, Zarqwa Hydroelectric, and Mawizeh Marshlands.
– The Oasis, per its name, also contains a few small pools of water.
– A river stretches from the north of Taraq Village, through Al Mazrah City, down to the Mawizeh Marshlands. It then splits in two directions: One part of the river continues west through Zarqwa Hydroelectric and down past Sa’id City. The other part continues south past Ahkdar Village to the sea section above the Al Malik Airport.
These waterways are incredibly useful for stealth operations, as Operators swimming underwater are hard to track down. However, while underwater, an Operator can only use small melee weapons like the Combat Knife and Sidearms, as well as equipment pieces like Throwing Knives. Still, these weapons are lethal enough to get the job done.
Some lethal and tactical equipment pieces, along with Killstreaks, also have special properties on water. For example, Proximity Mines will float and can explode boats that bump into them. Drill Charges, meanwhile, burrow into the water and explode under the water’s surface.
There are two major drawbacks to swimming: oxygen needs and boats. The former prevents you from swimming underwater indefinitely; the latter is instant death if they ram into you. So long as those are kept in check, feel free to use the water to your advantage.
Prepare to Drop In, Ready Up with Modern Warfare II
There’s a massive amount of content both at the launch of Warzone 2.0 and planned for the Seasons to come. However, to gain a full tactical advantage and a large amount of additional content, it would be wise to fully experience Modern Warfare II:
Purchase Modern Warfare II to get access to a ton of content across three modes, including the ability to unlock 14 Operators to use across both games, as well as other ways to quickly level up the available 30 Weapon Platforms and over 50 Weapons through Multiplayer and Special Ops.
Modern Warfare II owners also get MWII XP while playing Warzone 2.0 — at the end of each match, owners will receive additional XP on top of any XP that can be earned by all players.
That is all in addition to the content coming in Season 01, including the first ever Raid, arriving mid-season.
Those who want even more benefits should consider upgrading to the Vault Edition, which grants four additional Operators — Ghost, Farah, Price, and Soap — as Red Team 141; the FJX Cinder Weapon Vault; an ultimate version of a Weapon Blueprint with 50+ attachments included; the Season 01 Battle Pass; 50 Battle Pass Tier Tokens; and more.
Stay frosty.
Kaynak: callofduty.com

Yorum Ekle