Controls Overview: Three Ways to Play
In preparation for the worldwide launch of Call of Duty®: Warzone™ Mobile on March 21, it’s time to get acquainted with the game’s easy-to-use, in-depth, and completely customizable control schemes. Prepare to maneuver your Operator in a way that suits your exact playstyle. This article showcases three main methods you can use:
#1: Touchscreen Controls: The touchscreen controls allow you to tap and swipe across glass. No additional peripherals are needed, and the game can be played immediately, with an incredibly deep array of customization options for fine-tuning available during your initial few matches and beyond.
#2: Backbone One Controller: Transform your phone into a gaming console with Backbone One controller (sold separately) for iPhone and Android devices. Backbone One offers exceptional responsiveness and optimized preconfigured control layout.
#3: Bluetooth Controller: If you play Call of Duty on console or PC using a controller (sold separately) and wish to match the feel of your current setup, then Call of Duty: Warzone Mobile has you covered, allowing for a wide variety of Bluetooth game controllers — like the Xbox Wireless Controller — to work seamlessly.
Read on for a deeper dive into how this all works, for both Call of Duty: Warzone Mobile’s Battle Royale and Multiplayer experiences.
After downloading Call of Duty: Warzone Mobile and linking or creating your Activision ID, you’ll be ready to play a variety of Battle Royale and Multiplayer Matches. There’s no need to wait; you can immediately launch the type of match you wish to play (from the Battle Royale or Multiplayer Playlists) and get your thumbs ready!
Moving and (Auto) Hip-Firing
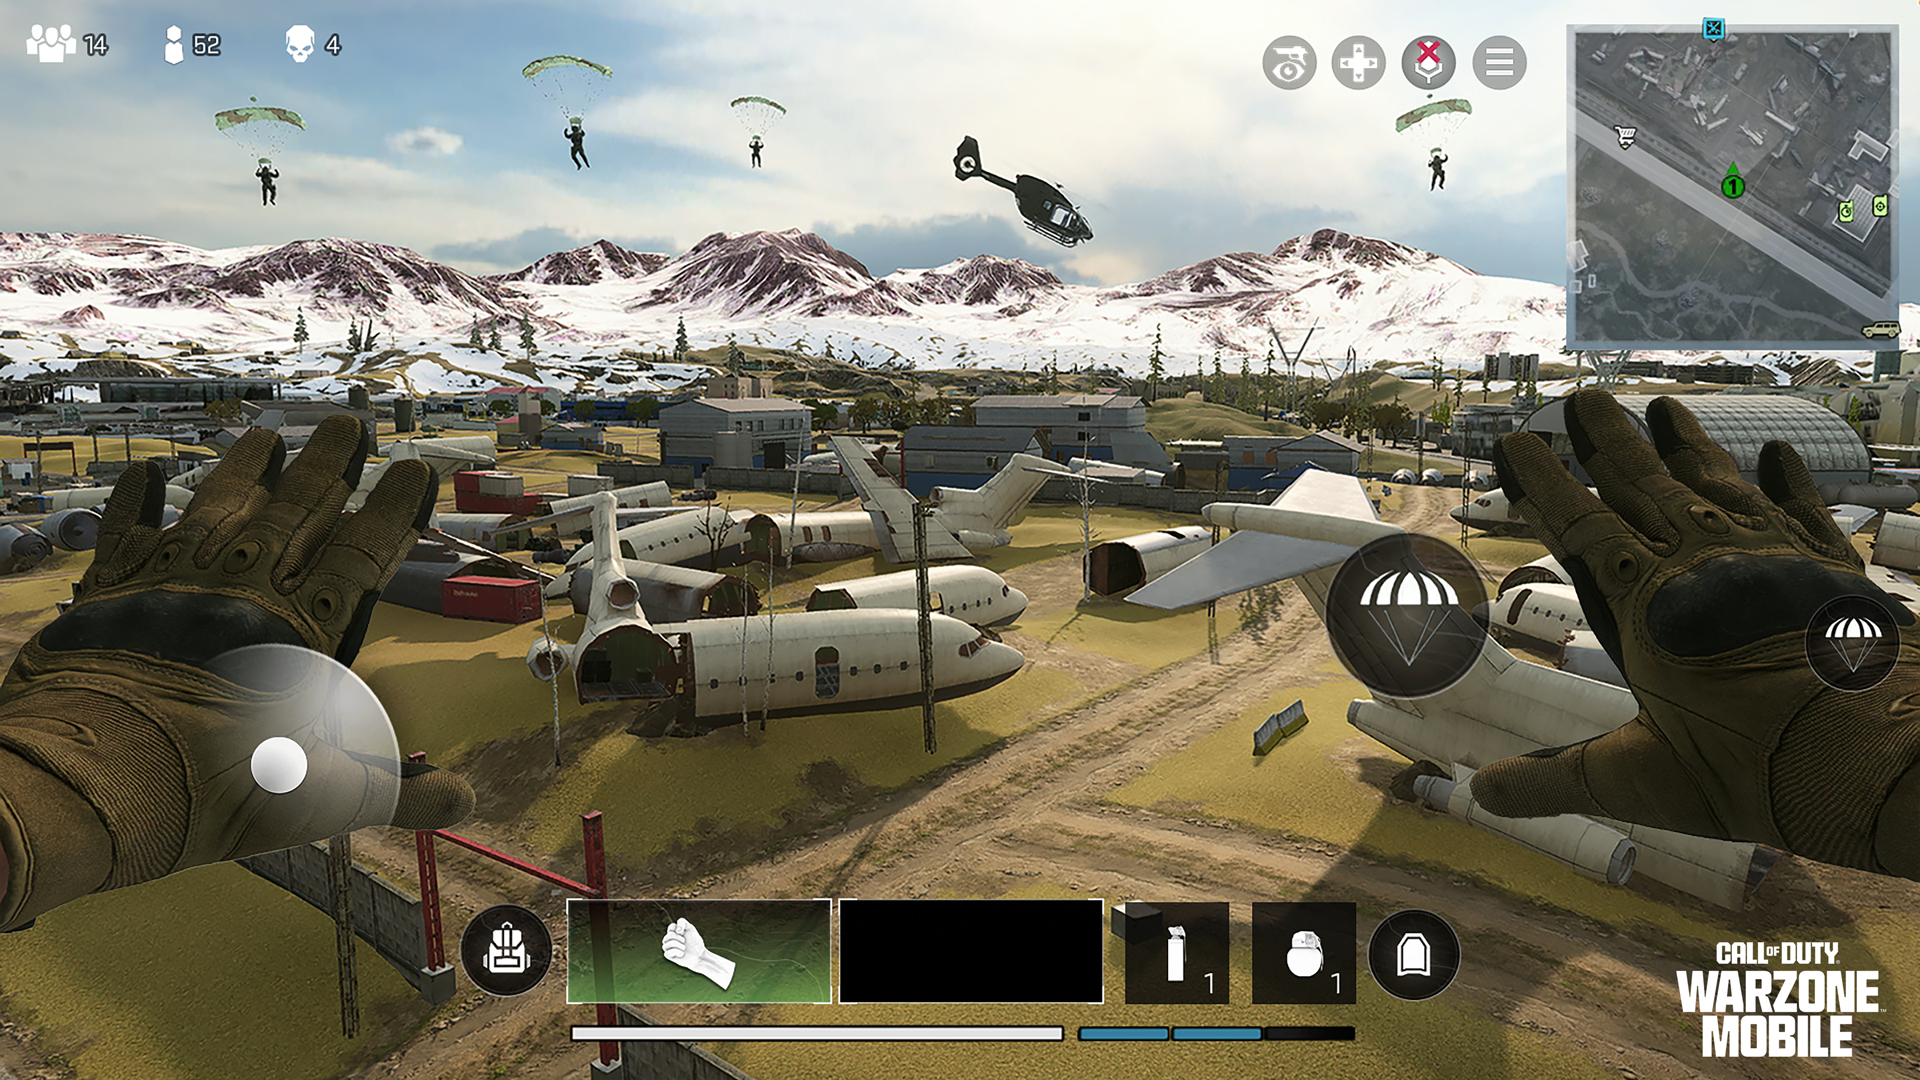
Playing “on glass” is simple to set up and learn, with a small learning curve, and you can gradually adjust your controls via the in-game overlay that appears on the in-game HUD (heads-up display). However, before you start to fully immerse yourself with the touchscreen customizations, it’s important to spend a match simply moving and (auto) firing.
When the match begins, your left thumb will govern your movement via the Virtual Control Stick in the bottom-left part of the screen, while your right thumb enables you to look and turn, as well as automatically fire at any foe that enters your crosshairs. By default, there is no hip-fire button; if you’ve positioned your crosshairs on an enemy, you’ll shoot at them.
Click on the Cog: Control Settings
Clicking on the small Cog icon, or entering the Settings menu during a match, allows you to select the Controls menu, which offers an incredible number of customizations, all with descriptions of what each function does before you decide to change it. How you use this depends on how dialed in you want to be, how you hold your mobile device while playing, and other factors.
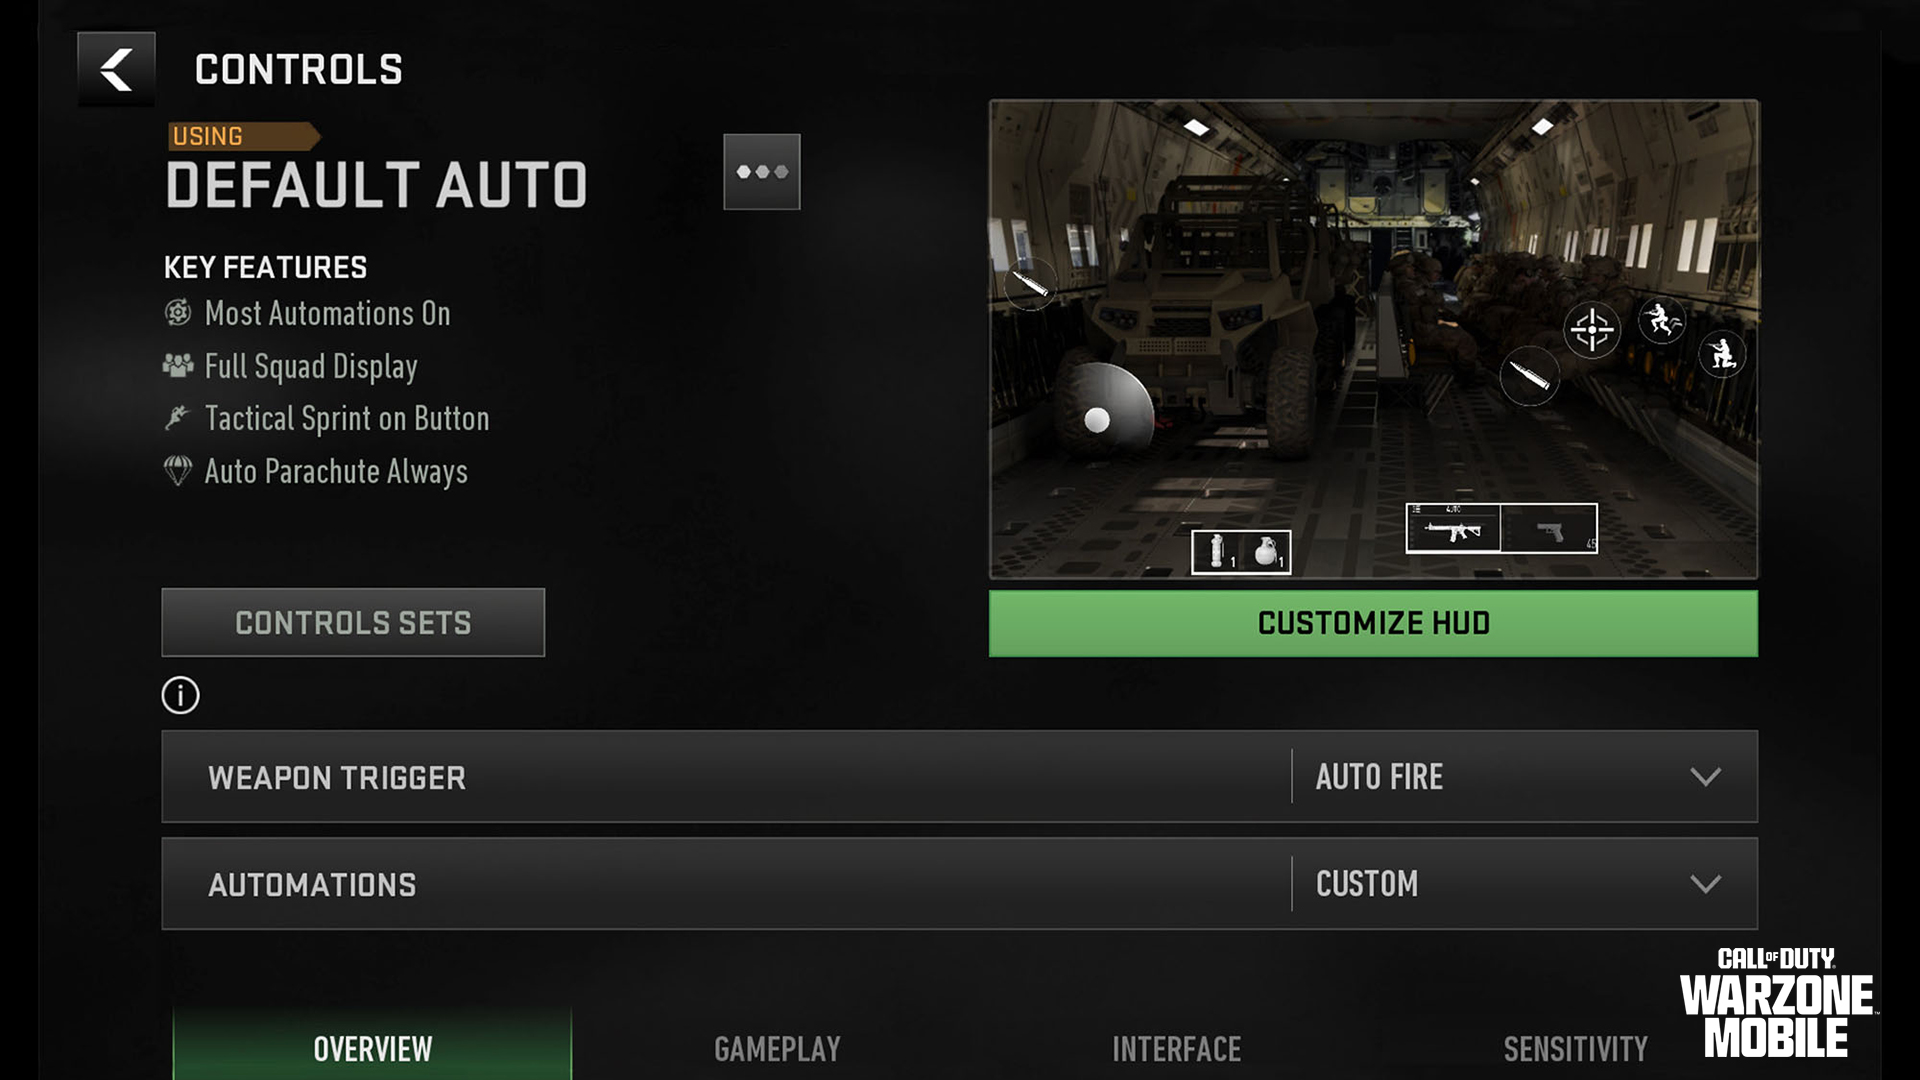
Start here! This screen allows you to set up your general HUD with as much or as little granular tweaking as you wish. Look for the following clickable menu buttons:
- Main Screen: This shows the Control Set you are currently using (“Default Auto”).
- Control Sets: Accesses the premade Control Sets (also known as “HUD presets”) you can choose from (which place all your control buttons in different locations across the screen, depending on your play style).
- Customize HUD: Accesses one of two screens (one for Battle Royale and one for Multiplayer) that show your current Control Set, along with every available button. This may look intimidating, but it’s not.
- Weapon Trigger: This allows you to Auto Fire all your weapons, customize the firing of each weapon type (e.g., allowing for different actions for Shotguns compared to LMGs), or choose Manual Fire to shoot using onscreen buttons.
- Automations: The game has most of your combat maneuvers auto-enabled to assist you while you learn how to play using touchscreen controls, like the auto hip-fire mentioned previously. This allows you to keep these features on, customize them in the Gameplay menu, or turn them off.
Control Sets (HUD Presets) Menu
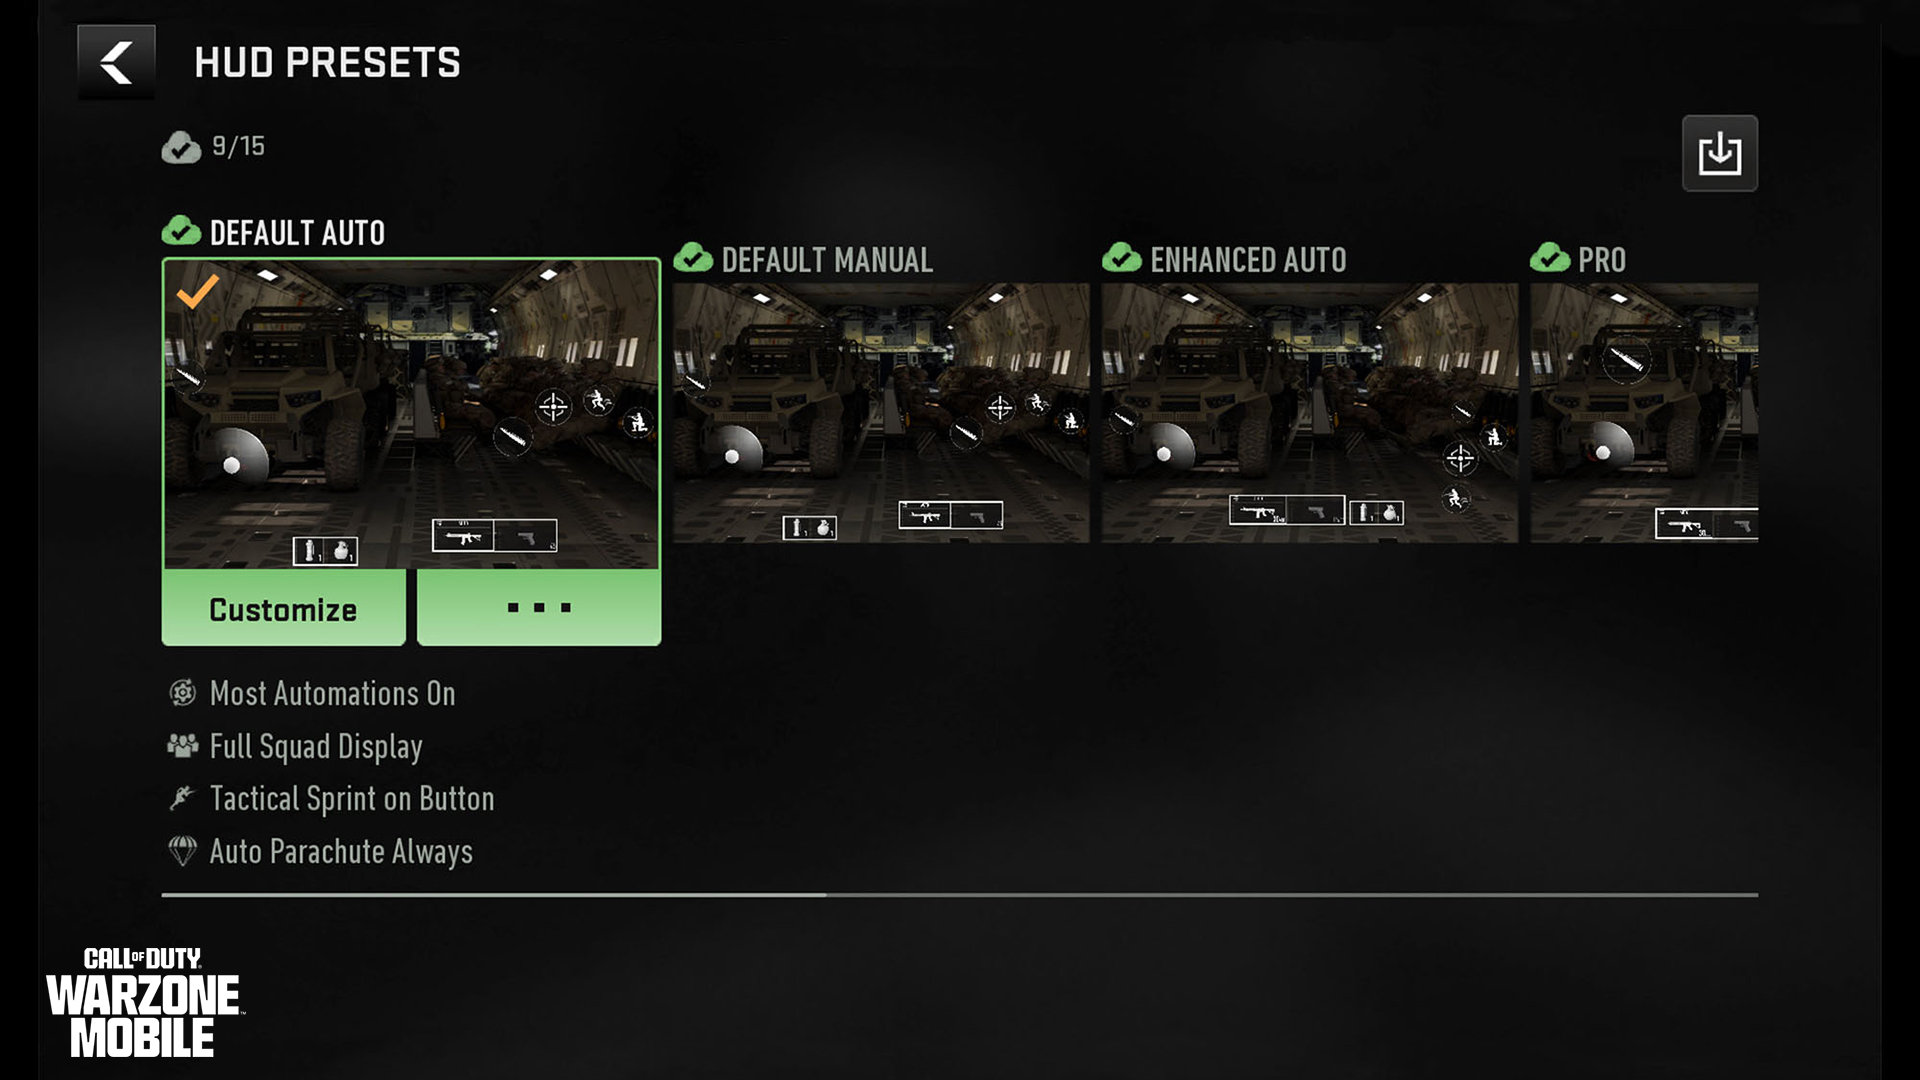
Look through the eight preset HUD displays to find the one that presents all the onscreen button locations that suit your play style. Each comes with a description — such as whether you hold a button to ADS (Aim Down Sights) or your sprint is auto-locked — and these serve a basic control setup. Some have been designed to mimic the classic Call of Duty feel and others are designed for professional play.
You can duplicate a preset, save it to the cloud to share to another device, desync it, or restore a preset to its original setup.
Customize HUD Menu
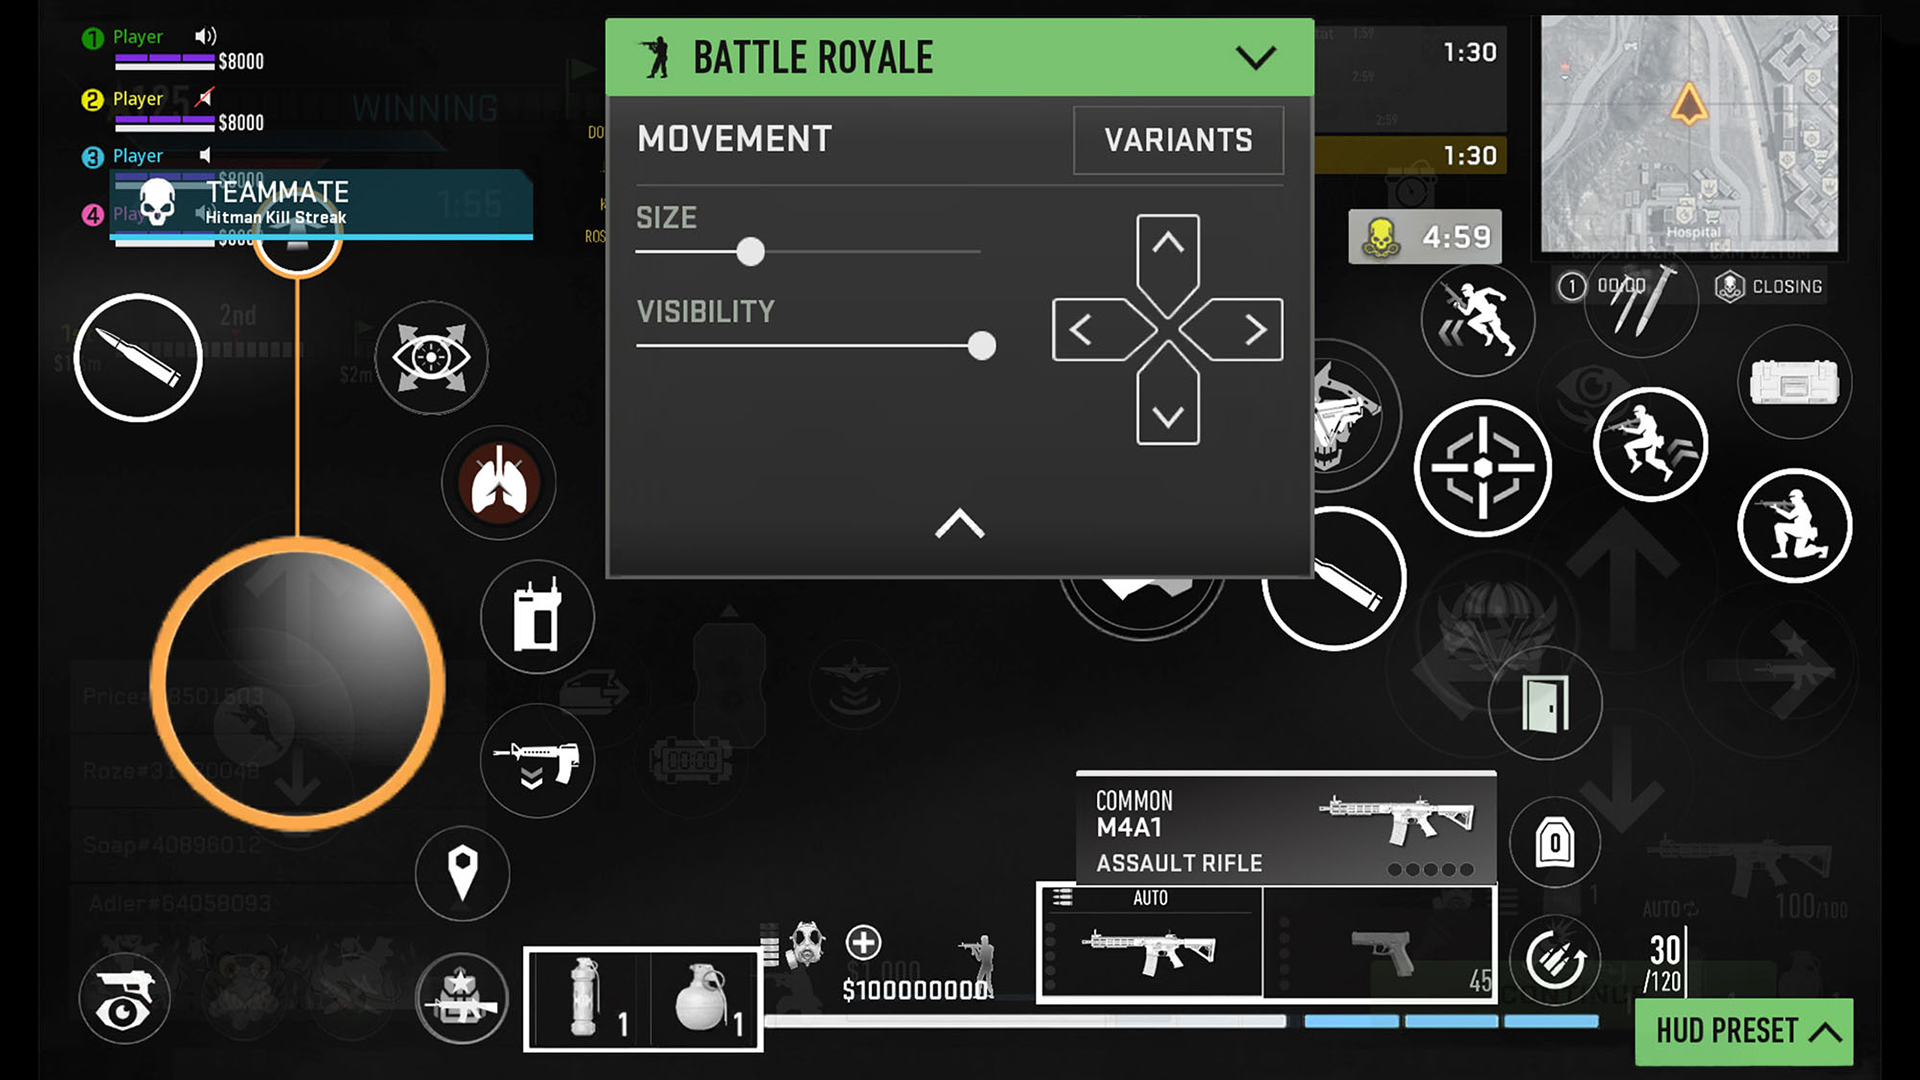
This is where you can make a limitless number of changes to every aspect of your control scheme. All of this is purely optional, but usually players delve into this menu once they’ve chosen an HUD preset that they enjoy using but want to adjust the location of a specific button for reasons of functionality or comfort.
Look at the central green box menu first; this allows you to switch between your Battle Royale and Multiplayer setups, as well as reset your HUD if you make a mistake. It also shows you which button you’ve highlighted (in orange) and the adjustments you can make to that button, such as changing its size, visibility, and any variants the button might have.
In general, you have complete customization for your HUD, including buttons you use frequently (ADS firing, Jumping, stance changing) and occasionally (the Tac-Map, teammate information, Gas Mask Status). Want to drag your firing buttons to the top-right corner because you hold your mobile device using the “claw” method? Then feel free! Need your Tac-Map to change shape from a square to a circle, disable the map’s rotation in-game, and switch it to a different corner? Completely possible!
The robust nature of this feature cannot be understated: Call of Duty: Warzone Mobile gives you total customization on every aspect of an HUD-functioning game element!
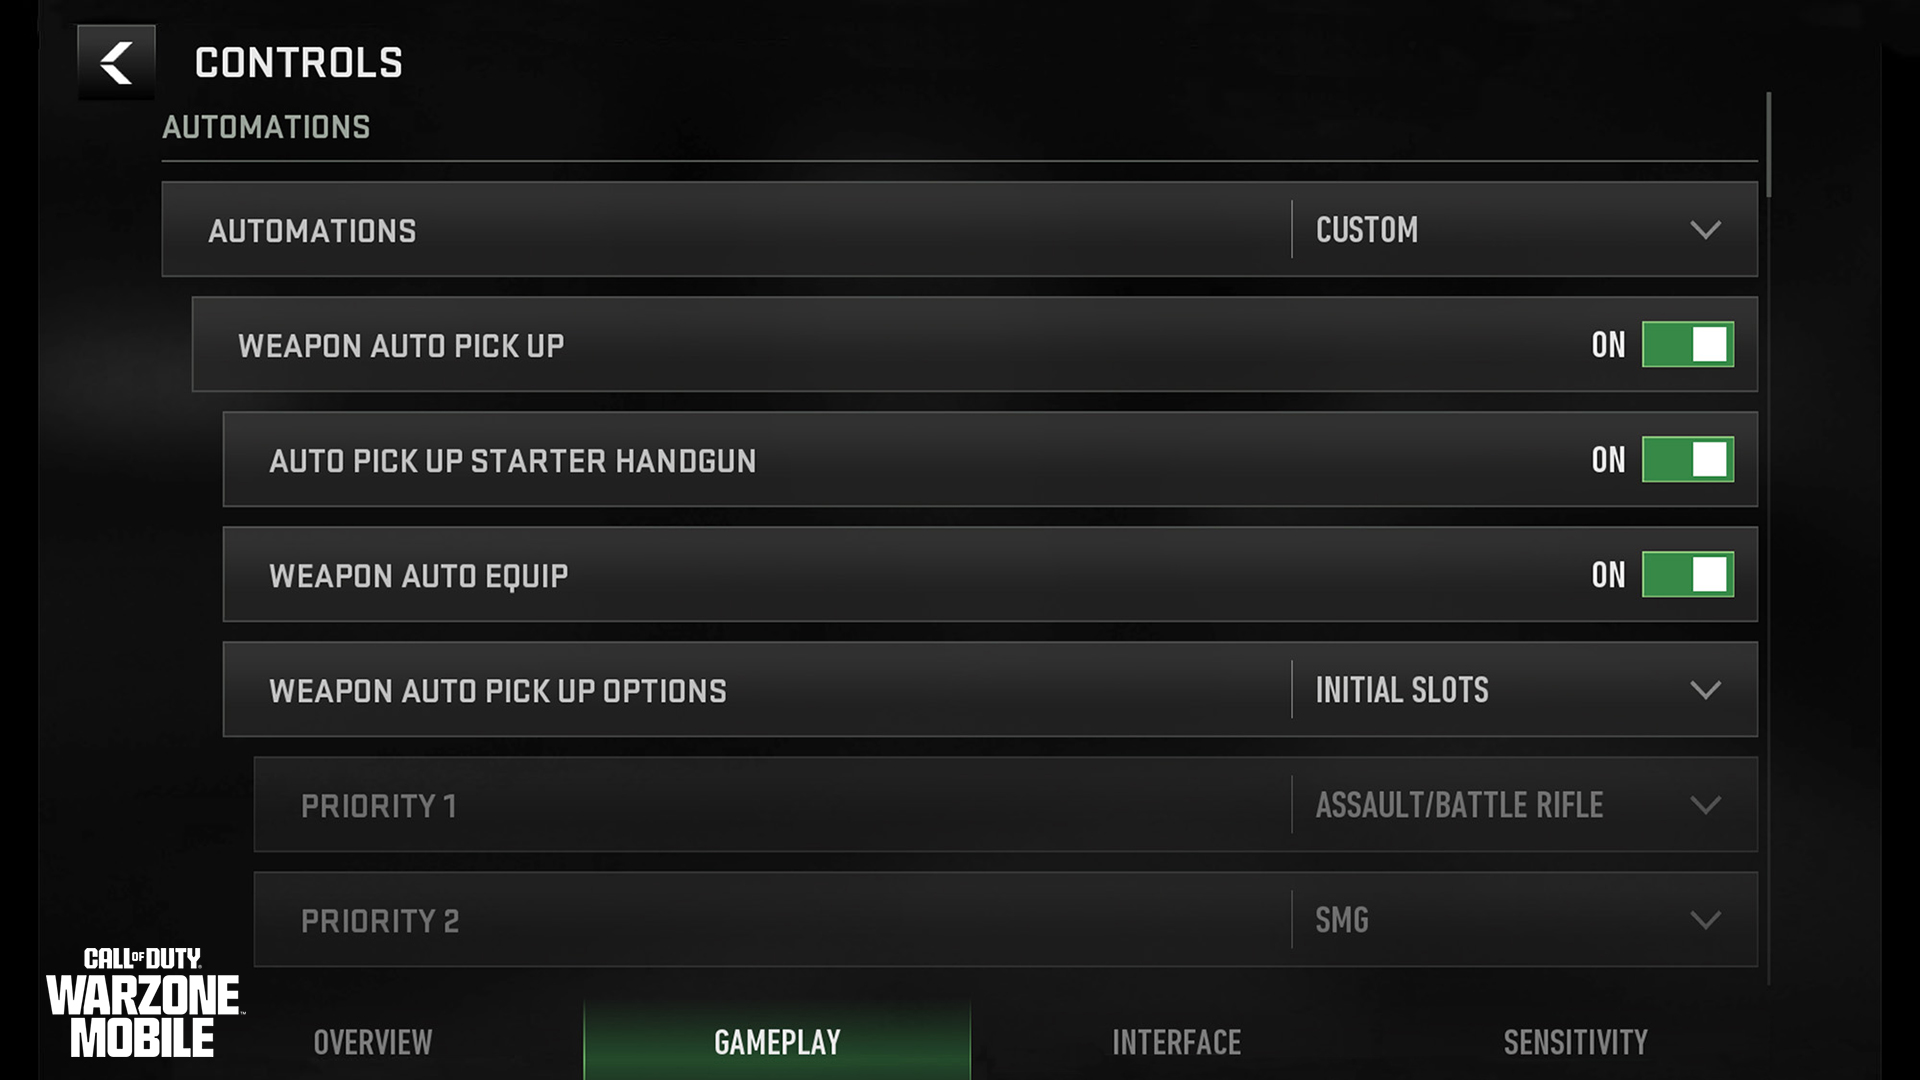
The second of the four Settings tabs allows you to adjust settings that influence gameplay. New players may find it easier to keep most options at default, while those wishing to emulate a similar control scheme to a console or PC experience should delve deeper into these settings.
Automations
This starts with turning Automations on, off, or customizing them. Choose “Custom” and you can see what Automations are available:
Weapon Auto Pickup: Enable or disable this, as well as whether your starter Handgun is picked up, whether weapons are auto equipped, and the priority of weapon types for auto pickup (e.g., you can choose Assault and Battle Rifles over Shotguns, or vice versa).
Turn to Damage Assist: Whether you automatically turn in-game to the source of enemy fire once it hits you.
Other Options: You can choose whether loot is auto picked up, how you mantle over scenery, your parachute deployment, how you climb stairs, crouch, if you have auto-assist while turning at corners, and how you equip Armor.
Movement
Change how the virtual stick behaves (allowing for auto Tac Sprint), how you sprint to a standing position, and how much camera control you have when performing a variety of functions, like firing, mounting, or aiming down sights.
Combat
Choose how automatic your weapon trigger is, how you fire on vehicles, whether your weapons fire only at targets within the weapon’s range, and how single-shot firing works on certain weapon types like pump-action Shotguns, Sniper Rifles and Launchers. Then you can adjust your ADS behavior depending on your weapon type (e.g., adjusting the settings for Shotguns and Sniper Rifles so you default to its more advantageous firing type, either hip-firing or aiming down sights, respectively).
Snap ADS fire can be set to a finger touch, you can choose how your ADS functions (via toggling or holding), how focusing certain ranged weapons works (automatically, toggling, or holding), and whether you melee automatically or not.
Interactions, Assistances, and Vehicles
You can tweak whether you bash open doors while sprinting, how force reloading occurs (i.e., off, on, or sprint only, which allows not interrupting to a reload during a sprint), whether equipping Armor can be interrupted or not, whether Armor Plates are equipped continuously or not, and whether Aim Assist is on or off. You can even choose whether to use arrows or your thumbstick to control vehicles.
Gyroscope and Controller
Using your mobile device’s internal gyroscope, you can control the in-game camera by physically tilting your device in any direction. Turned off by default, this can be used to add some additional movement to your main controls, and there’s a slightly higher learning curve. With some practice (starting with minor physical pitch and yaw maneuvers), you may prefer this additional functionality. Naturally, a full suite of options is available, allowing you to reverse the axis for horizontal, vertical, or all movement, and to toggle Gyro functionality off or on for ADS, movement, and vehicles.
Gyroscopic movement is sensitive and takes time to learn, which is why Call of Duty: Warzone Mobile allows you to incrementally change the sensitivity for each axis and offers an ADS sensitivity multiplier, including for every type of zoom (Low, 2x–3x, 4x–5x, 6x–7x, 8x, and High).
Away from Gyroscopic Movement, you can also change whether your Vertical Look is inverted or not, including having this function only while piloting airborne vehicles.
Outlines
Lastly, distinguishing your enemies and allies is an extremely important feature, and useful for knowing where your teammates are in all circumstances.
Squadmate Outlines: There are separate Squadmate Outline options (on or off) for Battle Royale and Multiplayer, the main difference being the Outlines of your BR teammates are visible through walls.
Enemy Outlines: Obviously, no enemies are visible through walls; the outline of foes appear when they are close to your aiming reticle, helping you aim during the chaos of both Battle Royale and Multiplayer modes.
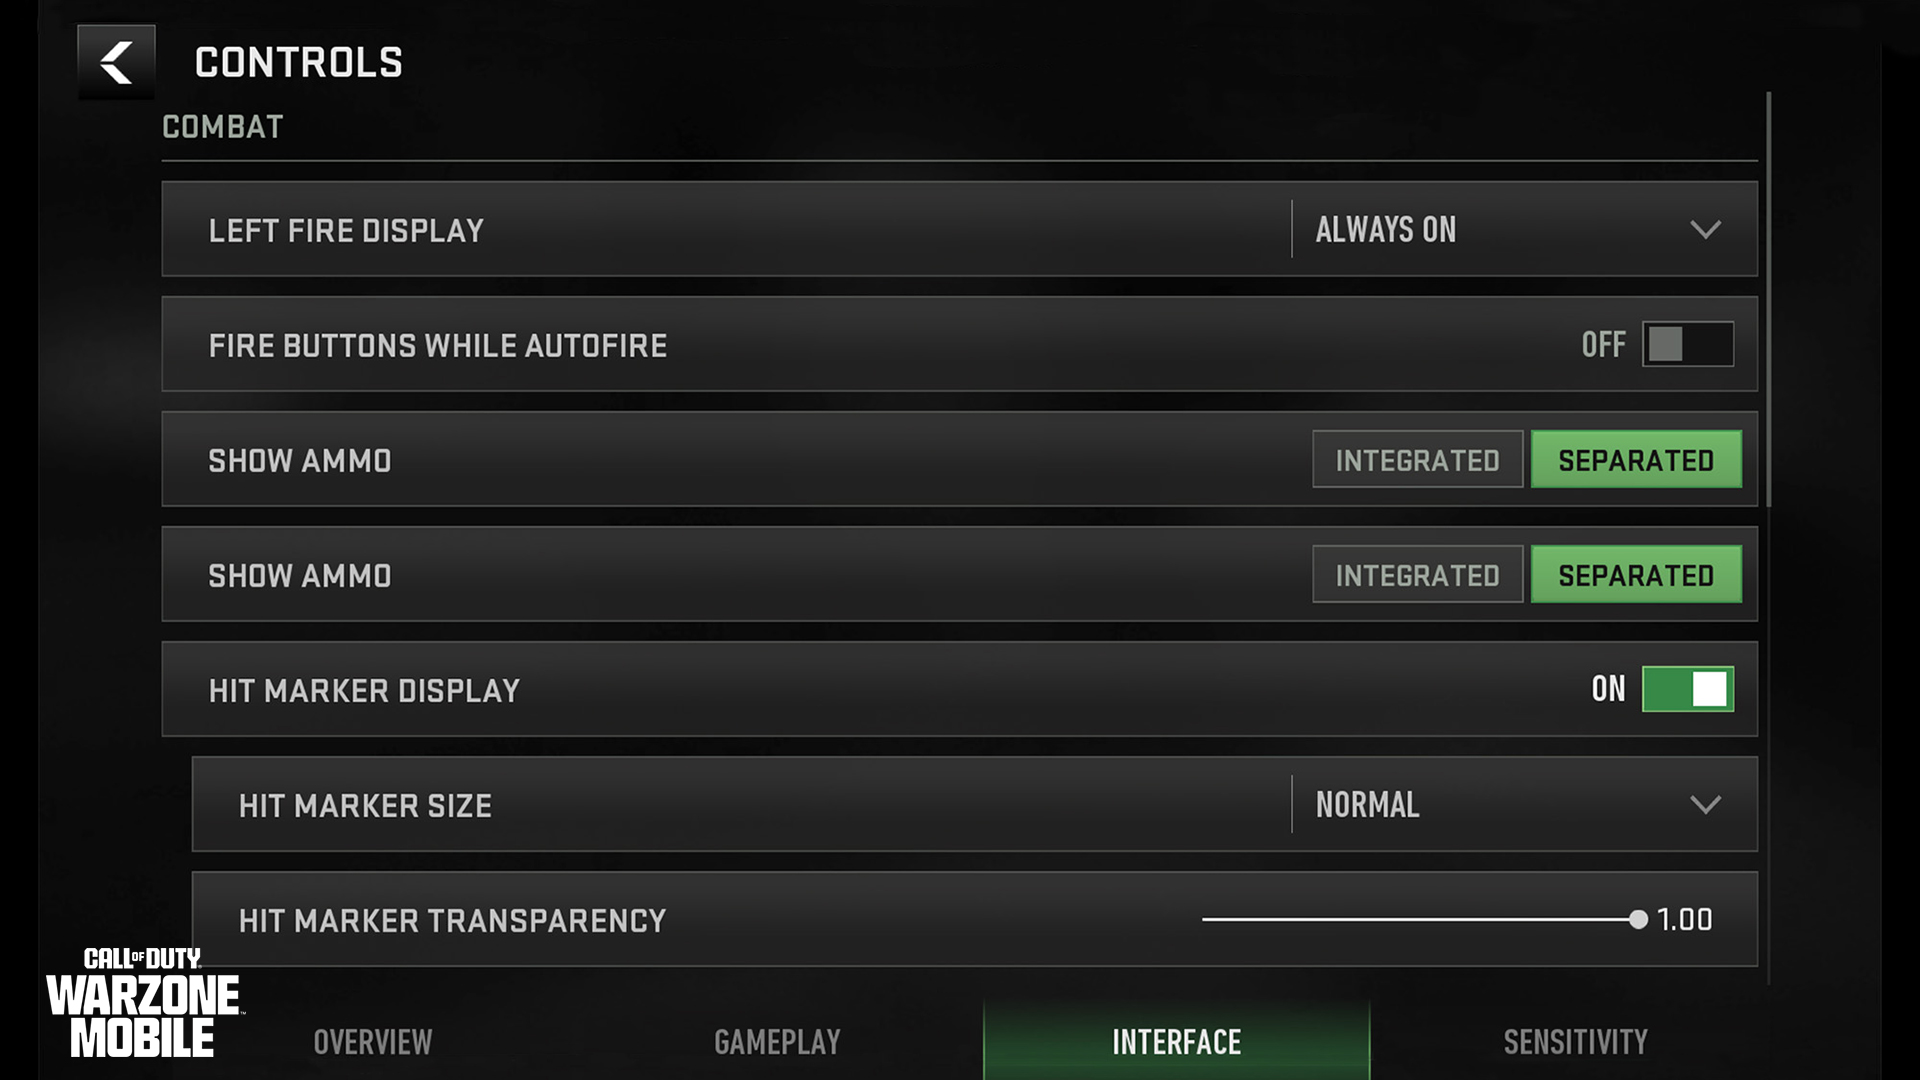
The third Settings tab allows additional adjustments for your interface, or the HUD elements (and sometimes buttons) that provide information rather than a context-sensitive function.
Combat
A variety of interesting combat adjustments can be made, including whether Hip Fire is on, and whether Fire buttons are on if Autofire is enabled. You can also show your ammo count for Primary and Secondary Weapons in an integrated or separate window.
Hit Marker Display: If you want additional confirmation that you’ve dropped a rival Operator, turn on the Hit Marker Display that adds a visual element when you damage a foe. You can tweak the size and transparency of this marker, too!
Movement
Some additional helpful settings allow you to lock Auto Sprint to a button above the virtual stick and provide flexibility when changing stance (either tapping Stance to Crouch and holding to go prone, or adding a button to split this stance change into two). You can choose whether to tap or hold while sliding and even whether the virtual stick snaps to your finger, which can be helpful when repositioning. Finally, those favoring an inverted camera (for either horizontal or vertical movement or both) can find this setting here.
Alerts and Tutorials
The final part of the Interface Menu enables a visual alert whenever you run low on Armor Plates or Ammo. It also gives a visual warning if Reload Canceling has occurred. You can view in-game tutorial tips during matches as you complete your touchscreen onboarding.
Controls Menu: Sensitivity Tab
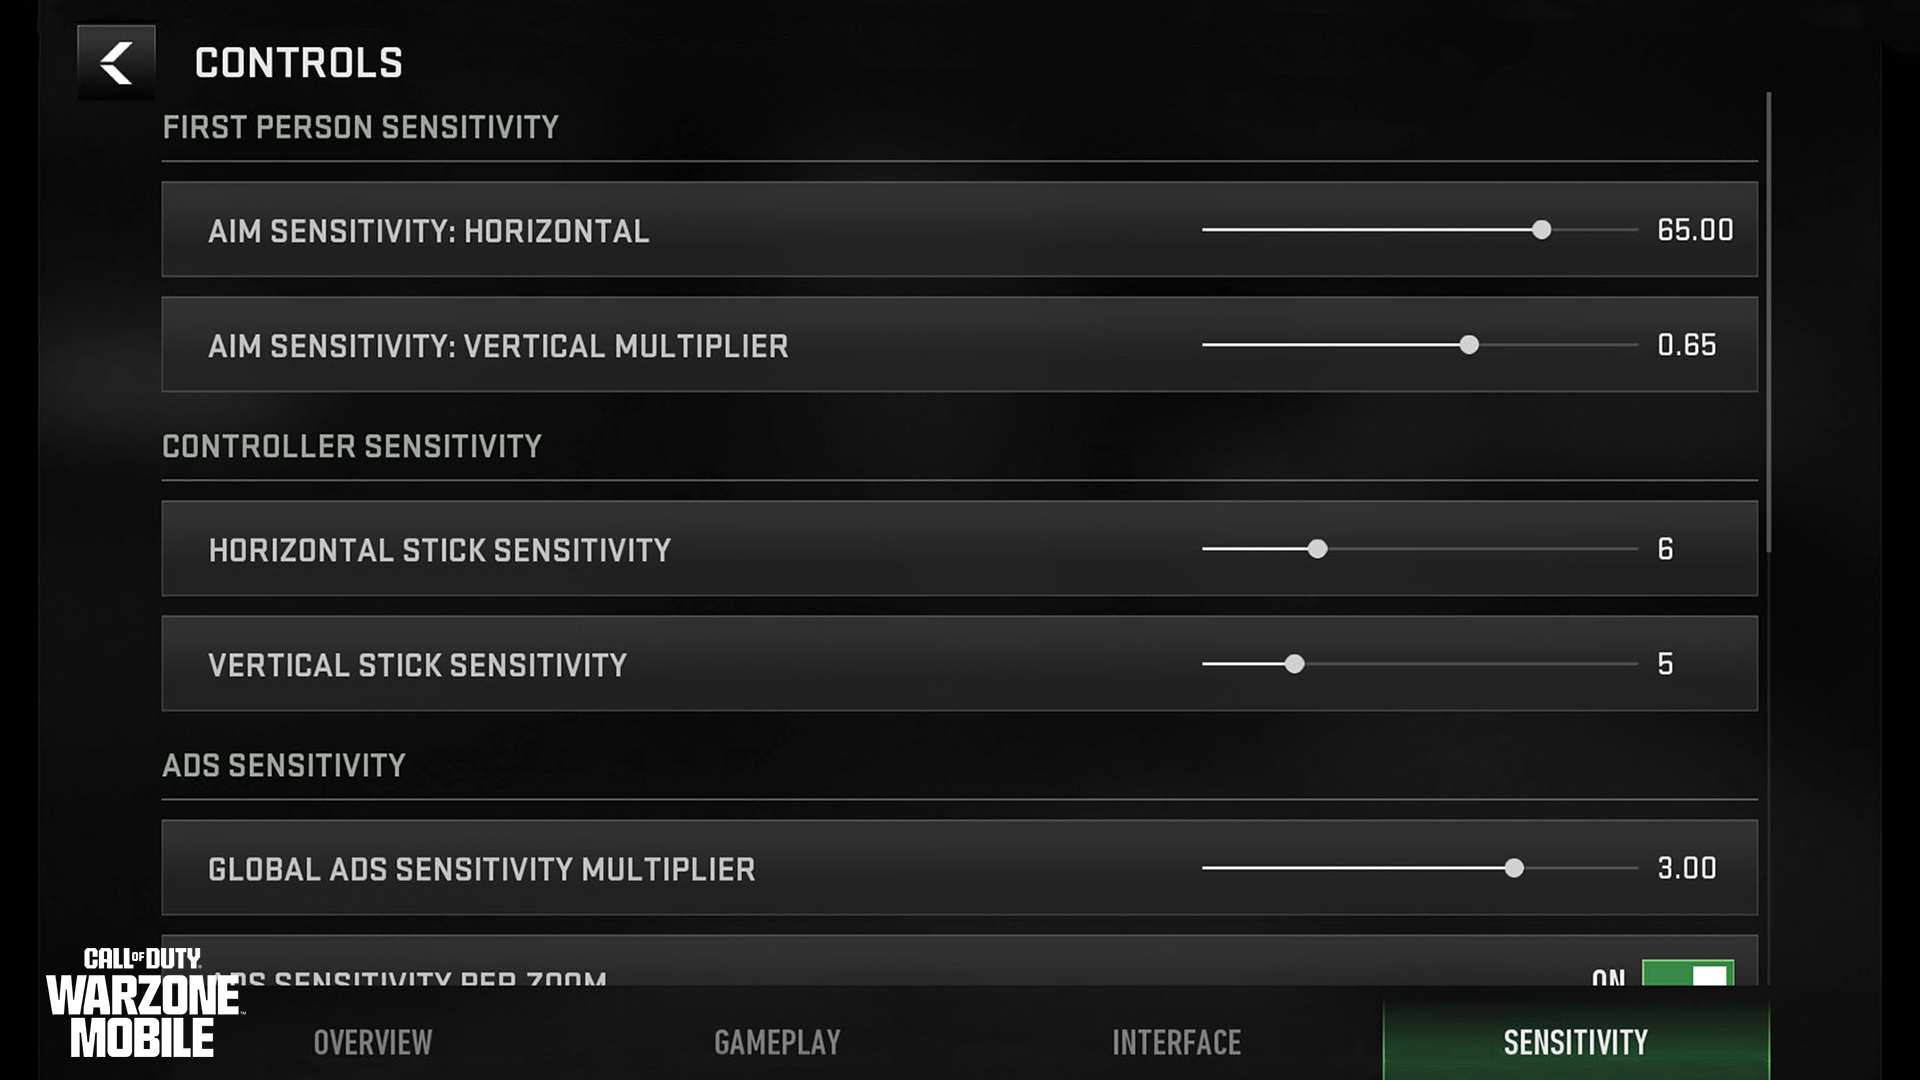
The final Settings tab allows the ultimate in flexible tweaking to your movement, ADS, and controller sensitivity settings, the latter of which is especially important if you attach a Backbone One or other peripherals.
First-Person and ADS Sensitivity
This setting affects how your digits interact with the touchscreen when it comes to controlling your movement during matches. It can be incrementally changed by a wide number of degrees, with separate sliders for both horizontal and vertical movement. Further adjustments can be made to your ADS, both at a global level (customizing the camera sensitivity while aiming down sights) and by adjusting the sensitivity for any of your optic attachments (Low, 2x–3x, 4x–5x, 6x–7x, 8x, and High). You can then apply a timing (instant, gradual, or after zoom) during the transition of your ADS, depending on when you want the sensitivity to start.
Controller Sensitivity
Call of Duty players familiar with controller menus should rejoice as separate horizontal and vertical axis sensitivity adjustments take a familiar form — increments from 1 to 20, with each increment changing the rapidity of your thumbstick moves, just as you would adjust in a game of Call of Duty®: Modern Warfare® III or Call of Duty®: Warzone.
Part 2: Backbone x Call of Duty: Warzone Mobile
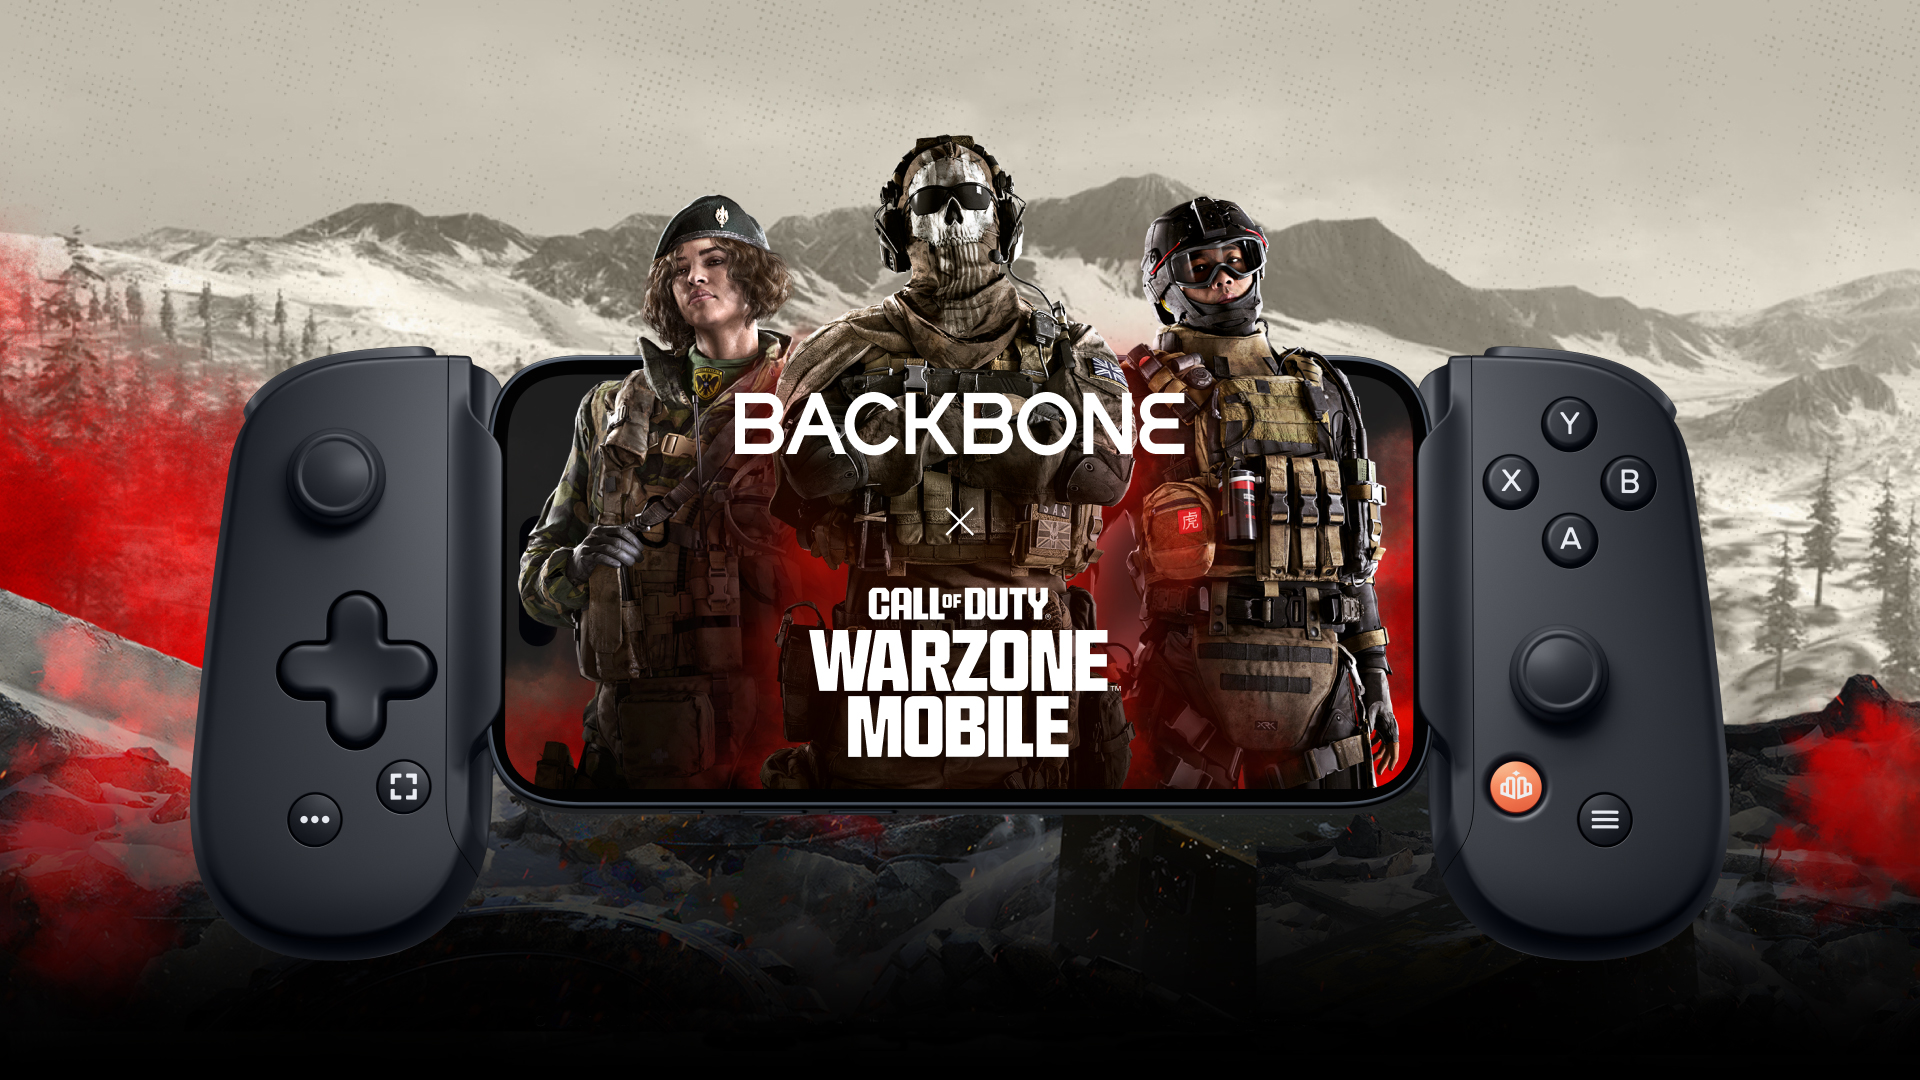
The second method of assuming complete control over Call of Duty: Warzone Mobile is to attach a “snap-in” accessory controller to your device.
We are excited to announce that Backbone is teaming up with Call of Duty: Warzone Mobile as our official controller partner, with an optimized controller experience across all Backbone One controllers.
Backbone+ Subscribers can take advantage of Double XP Tokens, as well as exclusive in-game items, including a Calling Card, Emblem, and Weapon Charm to further customize their Loadout.
Backbone is also releasing an exclusive Backbone One – Prestige Edition available through Best Buy Drops via the Best Buy Mobile Apps starting on March 13 at 12:00pm PST. The Backbone One – Prestige Edition comes with special packaging and extra Double XP Tokens.
Backbone One controllers feature both USB-C and Lightning connectors for a lag-free direct connection to your iPhone or Android device. All Backbone One second-gen controllers include magnetic adapters that allow for seamless phone fit and support for a wide number of phone cases.
Part 3: Additional Controller Support
The third method of assuming full control over your Call of Duty: Warzone Mobile Operator is to utilize a separate, supported controller, which usually connects over Bluetooth. Note that you can switch between touchscreen and/or controller at any time, and some menu access can only be controlled via touchscreen.
Supported Controllers
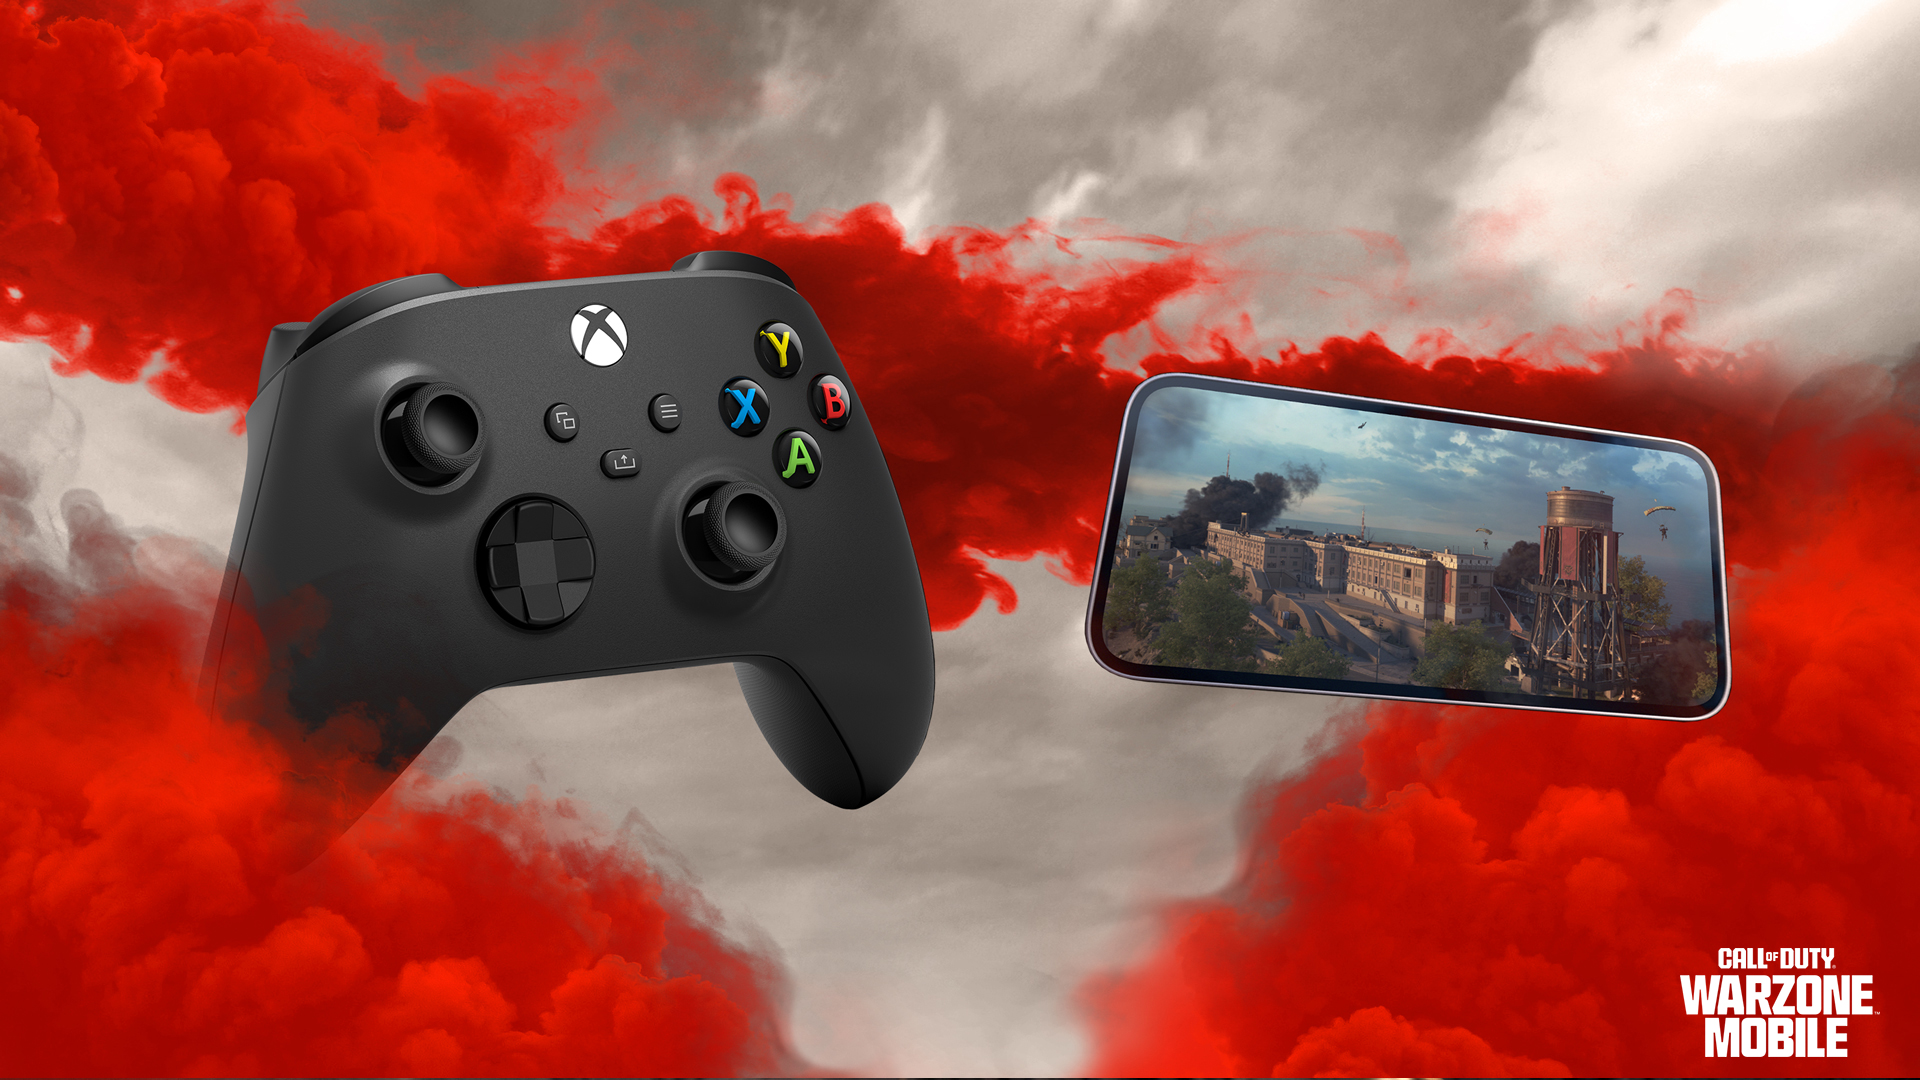
At launch, you can play Call of Duty: Warzone Mobile with the Backbone One controller, as well as any controller that supports Bluetooth connection technology. This includes, but isn’t limited to:
- Xbox Wireless Controller for Series X|S, Xbox One, Windows PC, Android, and iOS.
- Xbox Elite Wireless Controller for Series X|S, Xbox One, Windows PC, Android, and iOS.
- Sony PlayStation® 5 DualSense Wireless Controller
- Sony PlayStation® 4 DualShock 4 Controller
How to Connect Your Controller
Pairing your supported controller with your phone is primarily done via Bluetooth (although some phones may support a direct wired connection). Here’s a quick example of how to set up an Xbox Wireless Controller for Call of Duty: Warzone Mobile:
- Enable pairing on your controller. This is the small, slightly raised button just to the left of the USB port on the controller and marked with a “)))” icon.
- Enable Bluetooth on your mobile device, usually completed through settings.
- Within your device’s Bluetooth settings, locate “Xbox Wireless Controller” and connect to that device.
- Open Call of Duty: Warzone Mobile. From the Main Menu screen, ensure your Xbox button is on (by pressing it), and press a button or move a thumbstick on your controller.
- A “Controller Connected” message appears on the screen. Now modify your in-game controls for Battle Royale and Multiplayer Modes, and you’re ready to go!
Note: If your phone is left idle, the Bluetooth connection may disconnect, and you will have to reconnect your phone to the controller using the setup detailed above.
In-Match Controller Support
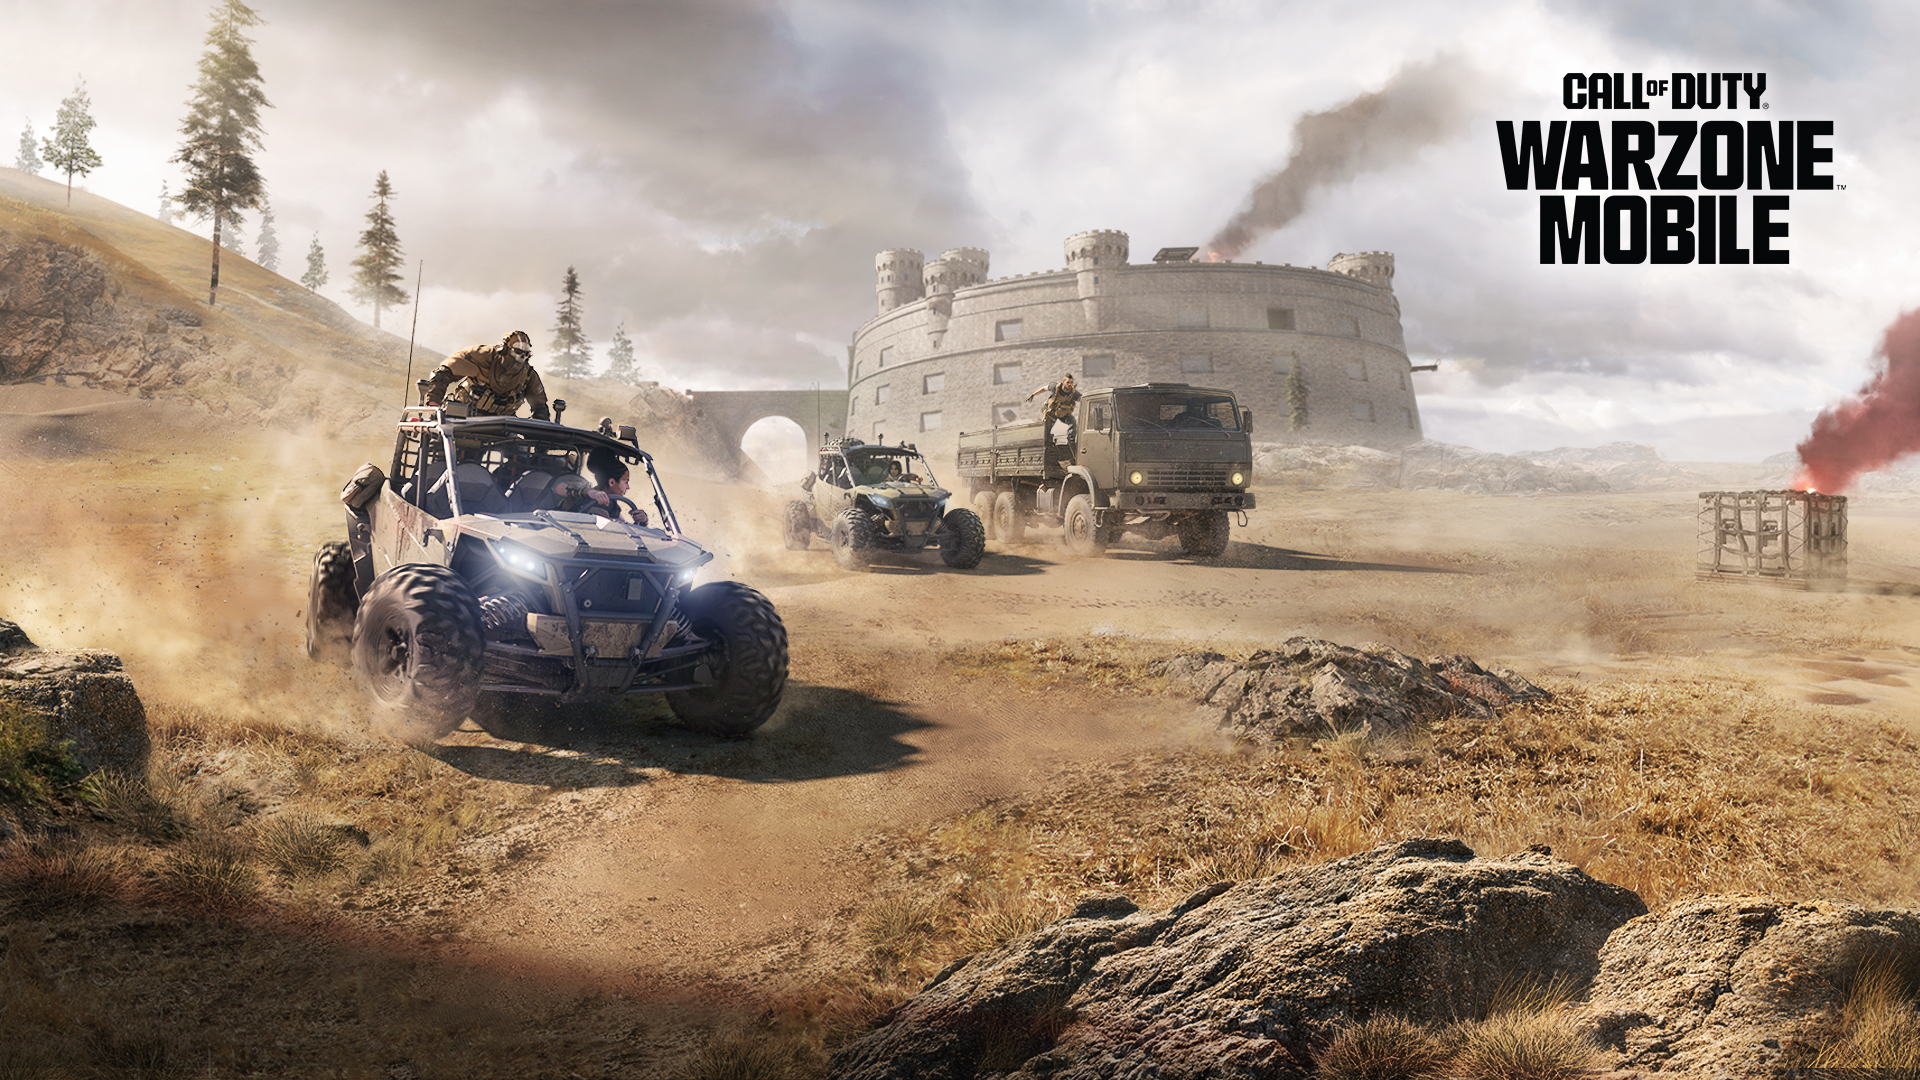
Note that most of the menu functionality in Call of Duty: Warzone Mobile, like choosing a Playlist or changing out a Loadout, is still controlled by touchscreen and your device’s native controls, and not your controller. This is normal: Launch your match, and once your Battle Royale or Multiplayer game begins, the game seamlessly switches over to full controller functionality for gameplay.
Also note that at worldwide launch, players using native touch controls, or any type of controller, will be matchmade together in the same pool of recruits. As the game evolves, we will evaluate balancing player matchmaking pools by native touch and controllers, as well as, potentially implementing different rules for control playstyles in competitive play.
Ready for Launch? Pre-Register Now!
Call of Duty: Warzone Mobile will be available to play worldwide on March 21, 2024. Join in and pre-register for free now by clicking here. In addition, go here for more information regarding pre-registration rewards.
For more, follow @warzonemobile on X, @codwarzonemobile on Instagram, and Call of Duty: Warzone Mobile on Facebook.
kaynak: callofduty.com

Yorum Ekle